Common Area
Introduction
The Common Area module offers comprehensive sections for managing all your banking needs, including maintaining bank accounts, recording banking transactions and statements, generating reconciliation reports, and managing foreign exchanges. Its user-friendly screens enable you to easily create new customers, vendors, agents, and other codes related to countries, cities, taxes, and more.
The Common Area serves as a centralized hub for managing common functionalities and data across all other modules of 1ERP. This helps you streamline your operations and maintain consistent and accurate data throughout the system. Whether you're working with the Accounts Payable module or the Fixed Asset module, the Common Area ensures that you have access to all the necessary information and functionalities.
Set Up Common Area
Please follow the steps below to set up the Common Area module:
1. Set Up the Firm
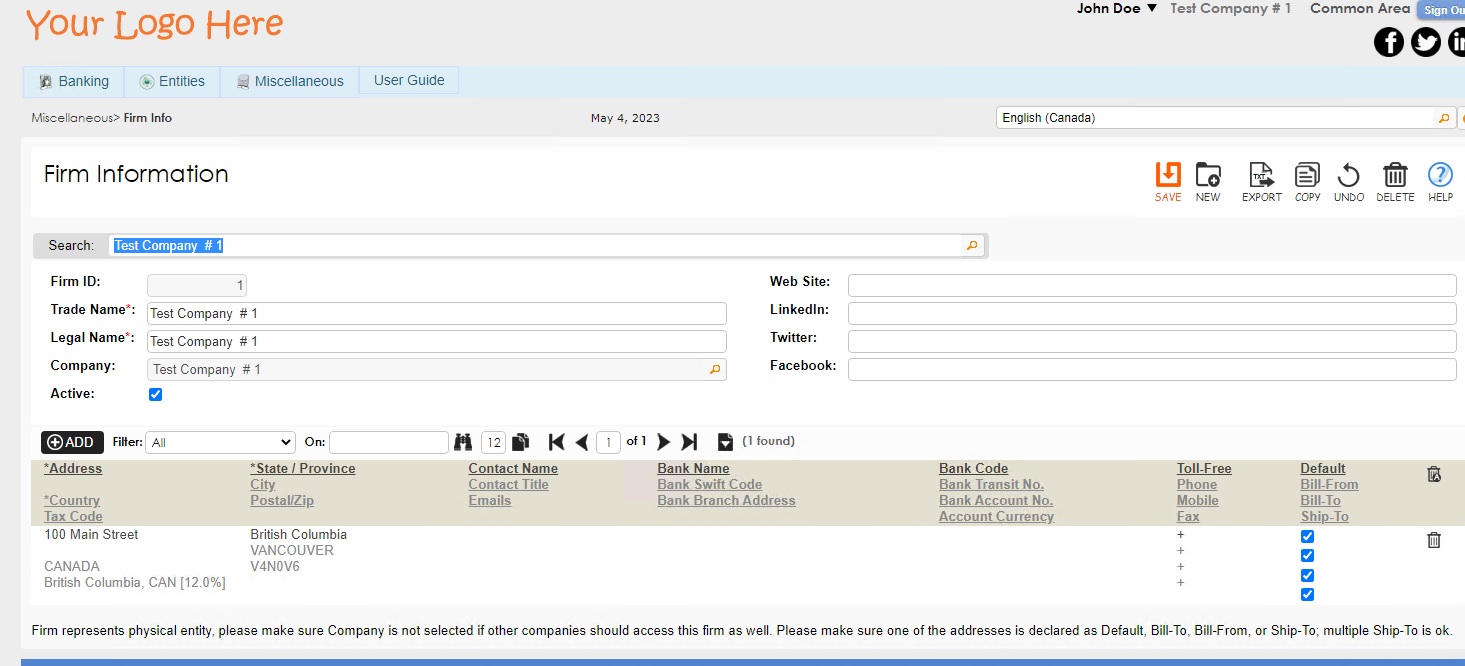
The initial point to proceed in 1ERP is the Firm. The Firm is a crucial component for setting up and managing all entities (i.e., customers, vendors, agents, and members) and their related information within 1ERP.
The mandatory fields are indicated by red asterisks, and the majority of screens are separated into master and detail tables. A sample Firm has been filled out below for your reference.
Navigation: Common Area -> Miscellaneous -> Firm Info and create a Firm.
2. Set Up Code Tables
The next step is to set up the code tables for Country, State, City, and Tax Code. This is a simple process of adding the necessary codes to each table. Add any specific tax codes that the business and its users will need in the system.
Navigation: Miscellaneous -> Country Table and add codes for Countries.
Navigation: Miscellaneous -> State Table and add codes for States.
Navigation: Miscellaneous -> City Table and add codes for Cities.
Navigation: Miscellaneous -> Tax Table and add codes for Tax Jurisdictions.

3. Set Up Entities
The next step is to configure the various entities within 1ERP, including Company, Project, Customer, Customer Job + Rate, Vendor, Agent, and Member Centre. These entities are permission-managed and serve as a foundation for all of the other modules within 1ERP.
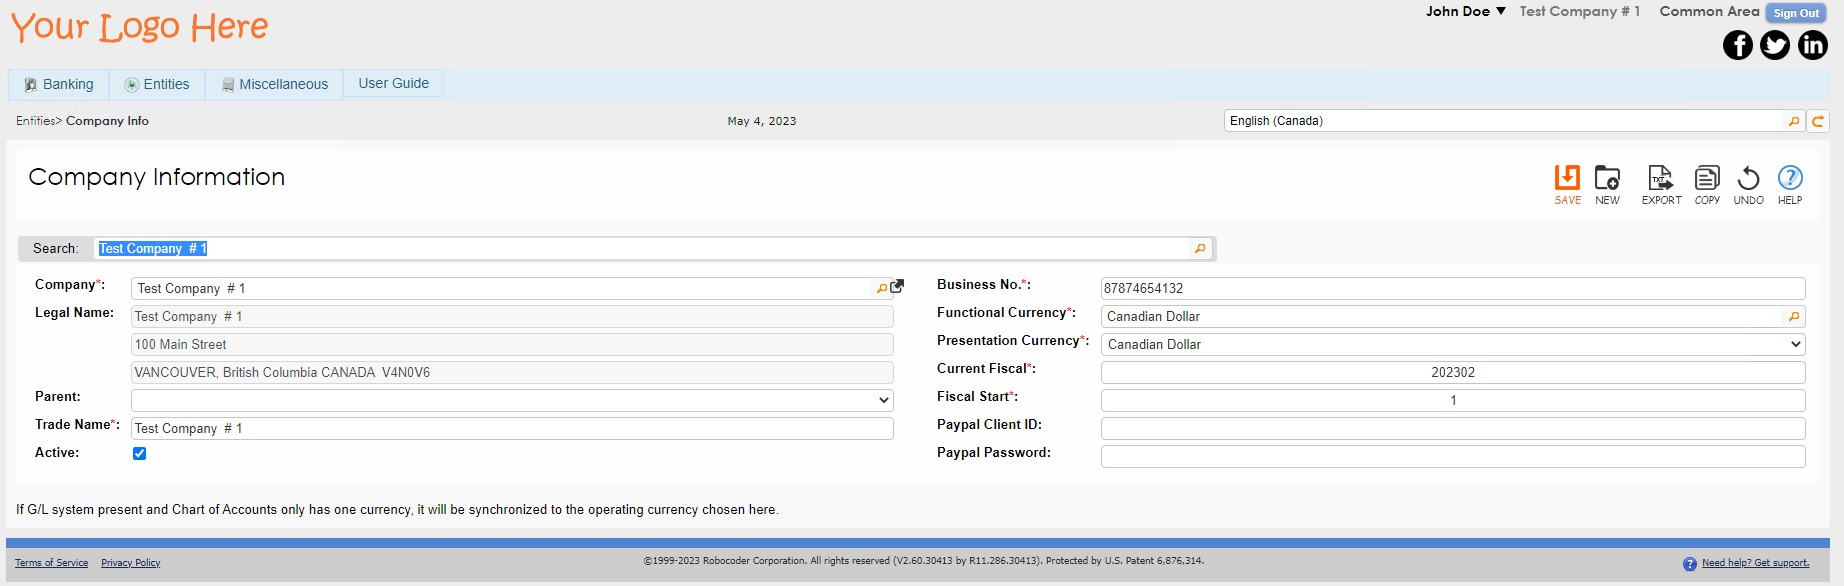
Setting up the Company and Project information is particularly crucial, as these two entities provide the necessary framework for the rest of 1ERP. By accurately configuring these entities, the data in 1ERP can be consistent and accurate across all modules, helping to streamline operations and simplify workflows.
Navigation: Entities -> Company Info and enter in Company Information.
Navigation: Entities -> Project Info and enter in Project Information.
The Project entity type organizes and displays information related to a specific section of a company. It's similar to how a company may have a head office and multiple locations. Each location operates independently but is still part of the company. A Project entity organizes information for a specific part of the company, such as a department or team, while still enabling information to be viewed for the company as a whole. This can be useful for tracking progress, managing resources, and making decisions based on specific areas of the company.

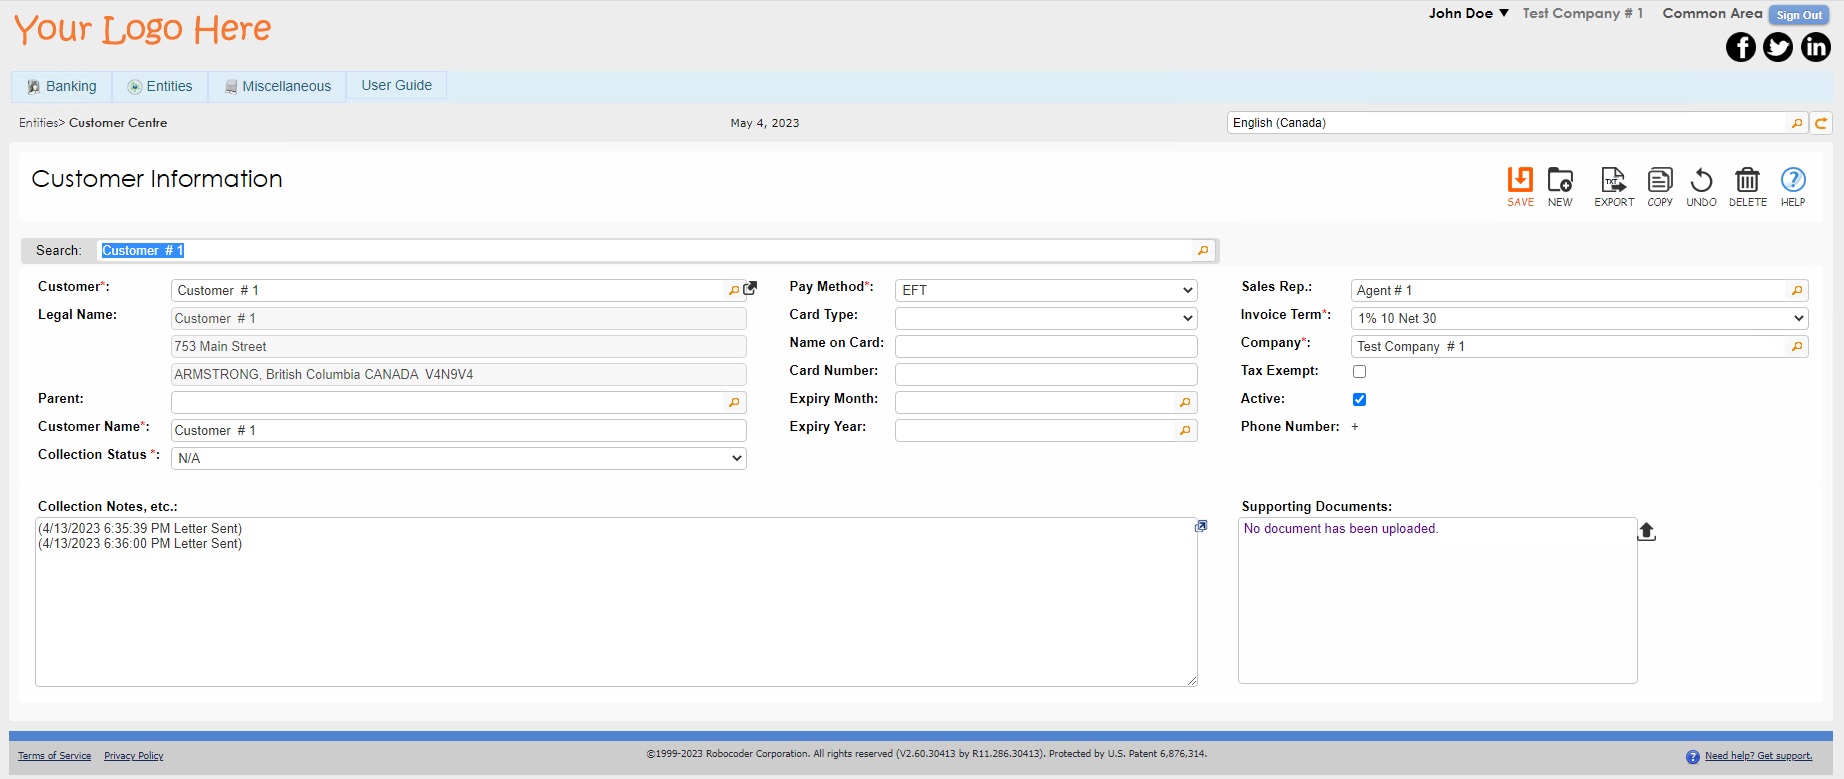
Navigation: Entities -> Customer Centre and enter in Customer Details
The Customer Information screen helps us add information about people or companies who receive services from our company.
Note: Before we can set up the Customer Info, the company needs to create a record for the customer's firm in the Firm Info screen. This is because the customer is also considered a firm and has its own information that needs to be recorded.
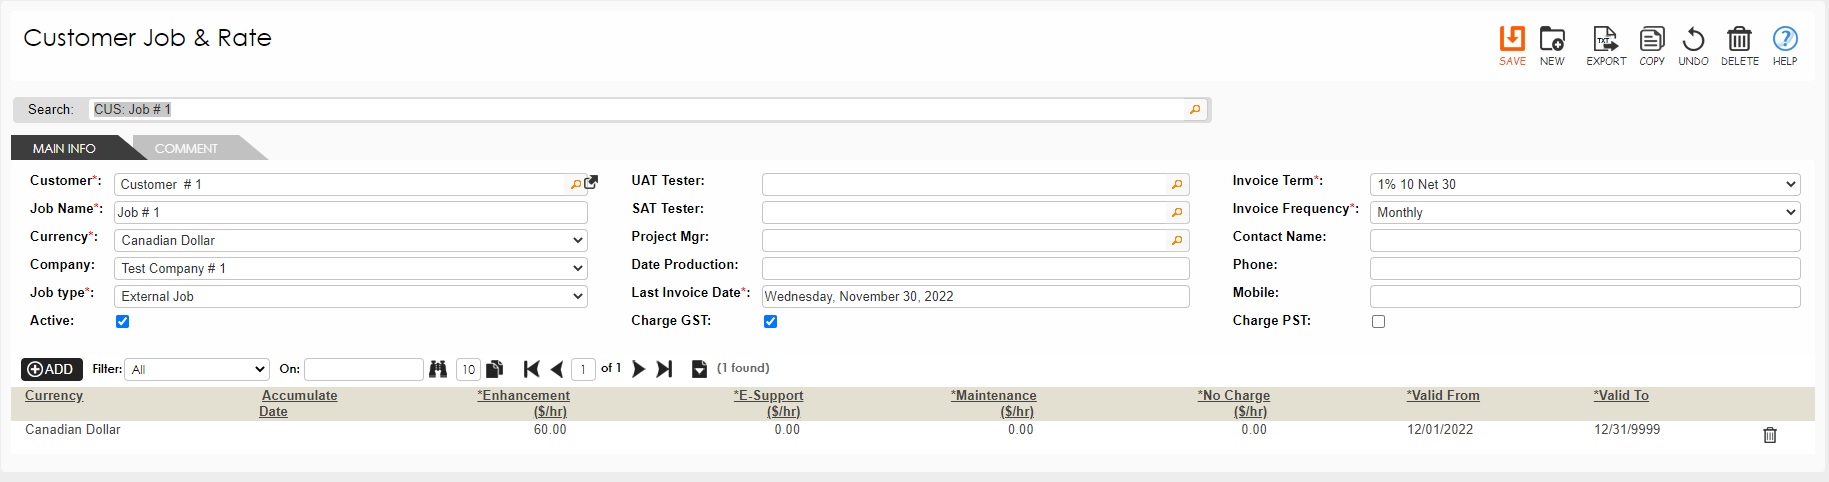
Command:Entities-> Customer Job + Rate
To enable the expense reporting system, it's necessary to establish the customer and job rate information. Below is an example of a completed customer job form for your reference:
Command: Entities-> Vendor Center
The Vendor Information screen allows us to add information about the entities that provide services to the company. These entities are called Vendors.
Note: Before setting up the Vendor Information, the company needs to create a record for the Vendor's firm in the Firm Info screen. This is because the vendor's firm information is necessary for properly setting up the Vendor Information.

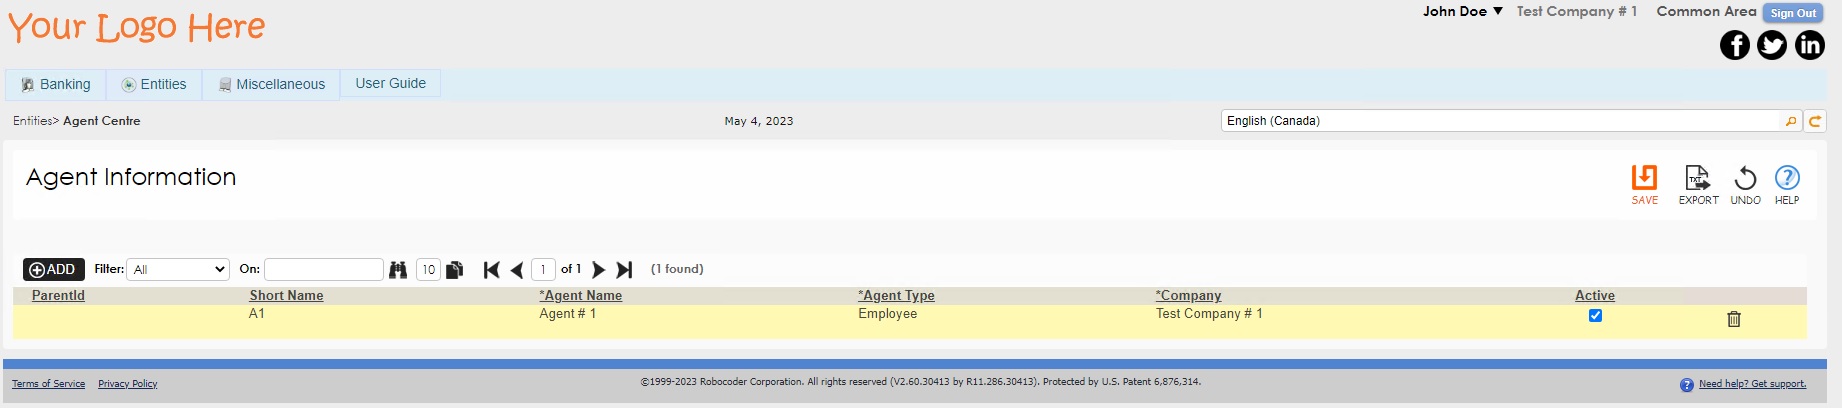
Navigation: Entities-> Agent Centre
The Agent Centre screen keeps track of information on the company's Sales Representatives. These individuals can be either Vendors or Employees of the company. This information is important because it helps the company keep track of the sales made by each representative and allows the company to pay respective commissions to these representatives.
The Accounts Receivable module in the Invoice section is where sales made by each representative are recorded, and the Accounts Payable module is where the company can pay commissions to the representatives. By having a central location to store and manage this information, the company can better track and manage its sales and payments based on each representative.
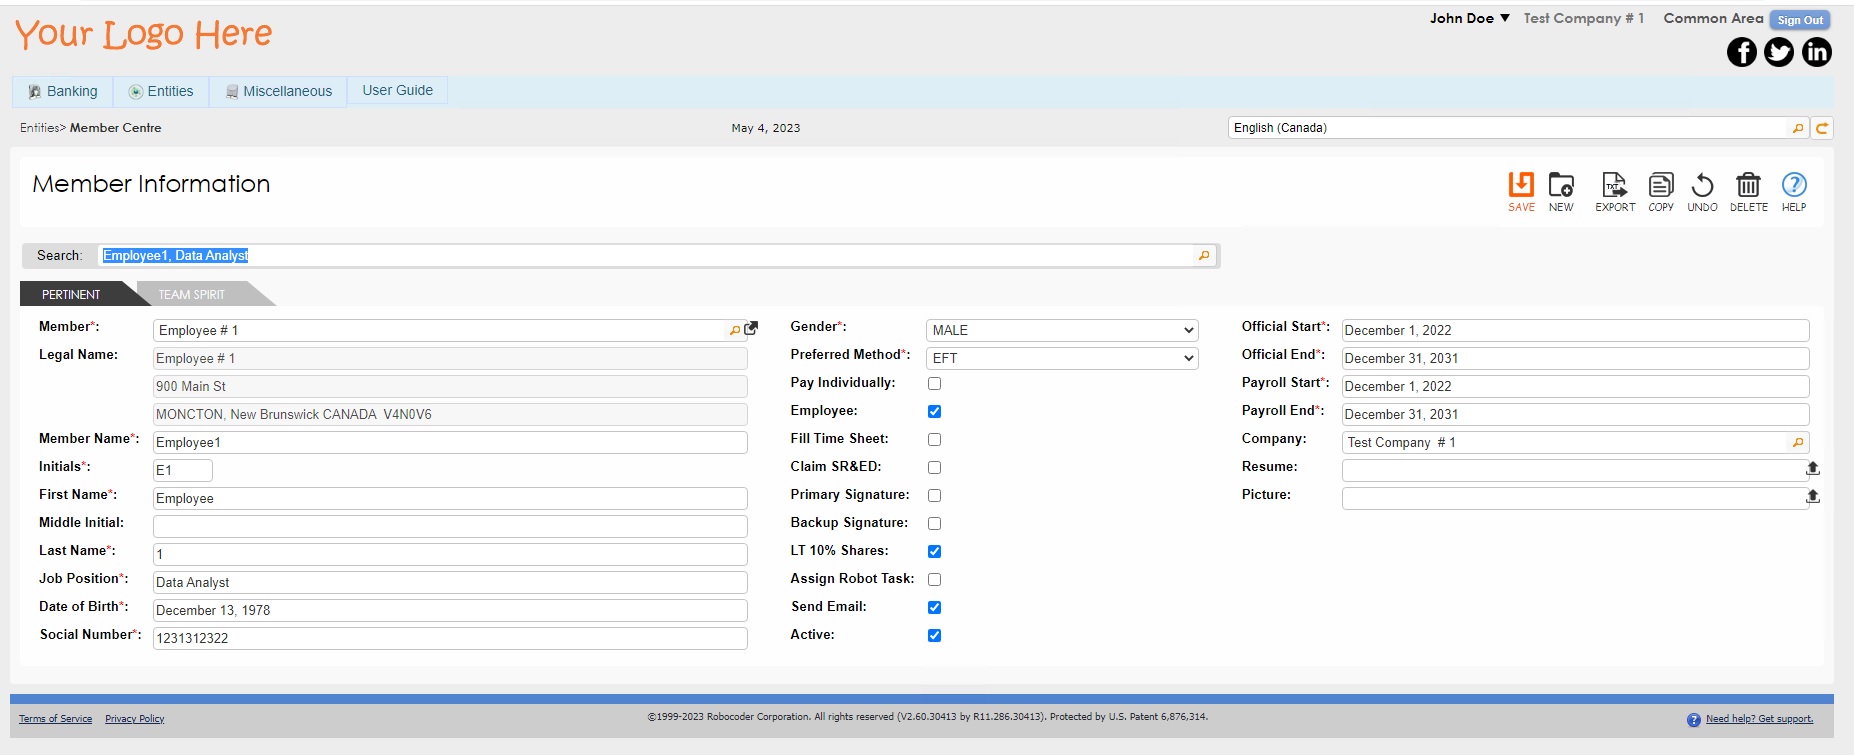
Navigation: Entities -> Member Centre
The Member Centre screen is where the company can enter information about their employees. This information is then used in the Payroll module to calculate employee wages, taxes, and other deductions. By keeping accurate employee information in the Member Centre, the company can generate payroll and produce reports with ease. This module helps to keep track of employee work hours, salaries, benefits, and other related information, making it an essential tool for any company with employees.
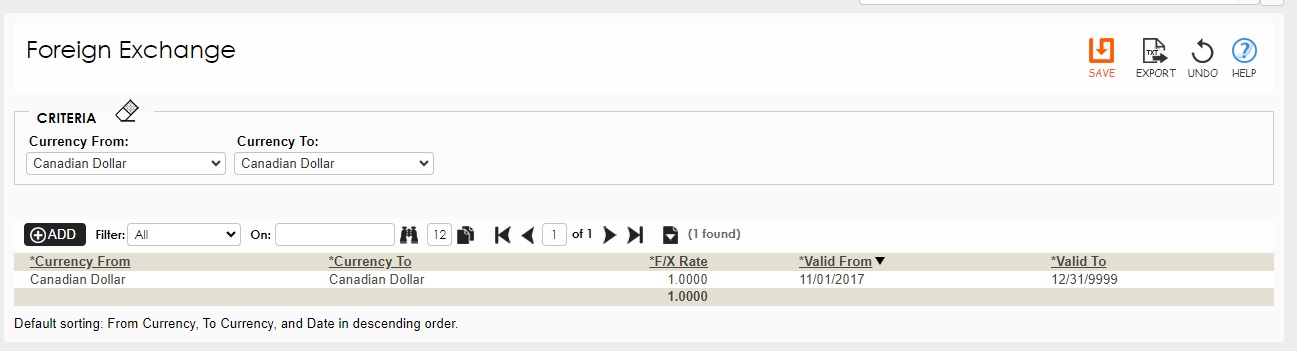
Command: Banking-> Foreign Exchange
The Foreign Exchange screen allows the capture of exchange information for the currencies used in the system. Please find below sample exchange rates setup for different currencies. Please select the appropriate currency and enter the exchange rate on the 1st of month for the previous month and click the Save Button to make the change permanent.

Features in Common Module
Please follow the steps below to setup the Banking Area section in the Common Area module:
Navigation: Banking -> Bank and set up a Bank.
The Bank Screen is used for setting up Banks with which the company has accounts and would like to manage the same account(s) in 1ERP.

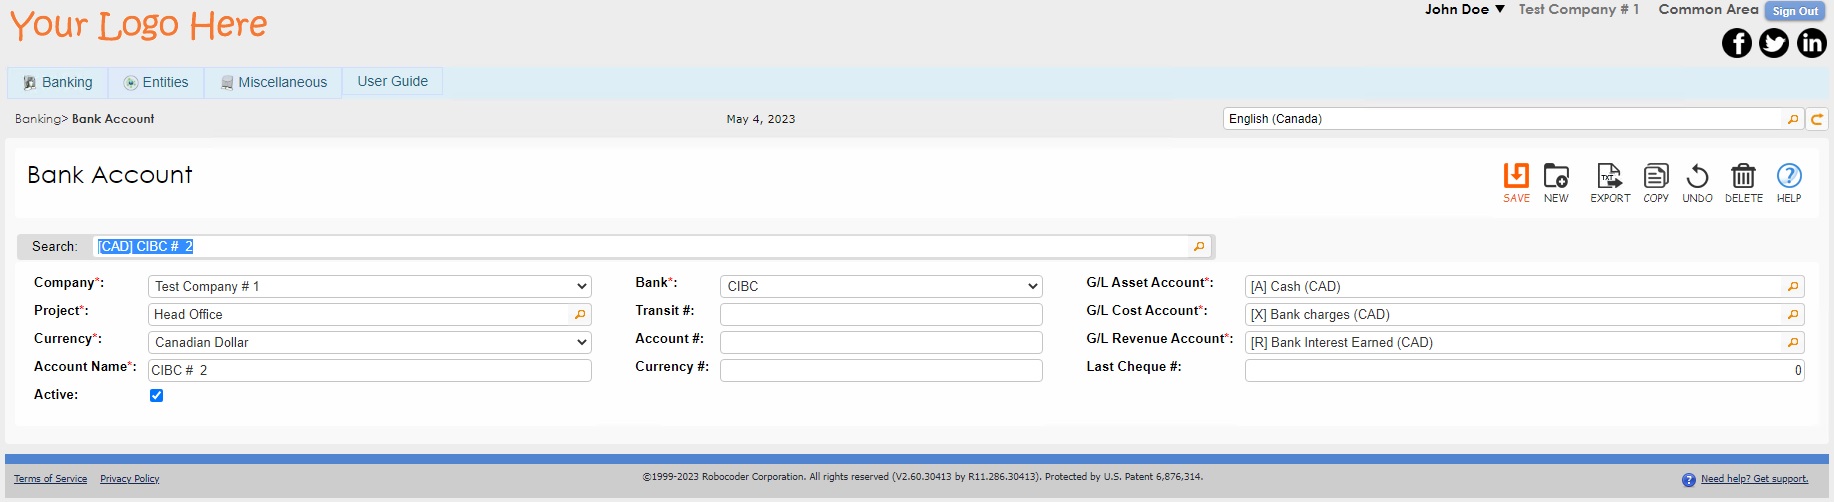
Navigation: Banking -> Bank Account and set up Bank Accounts.
Note: before this screen can be setup completely, the General Ledger Banking Accounts related to the Bank Accounts need to be created. Please watch the 1ERP Initial Setup Video for a step-by-step process on setting up the General Ledger Accounts.
Banking Processes
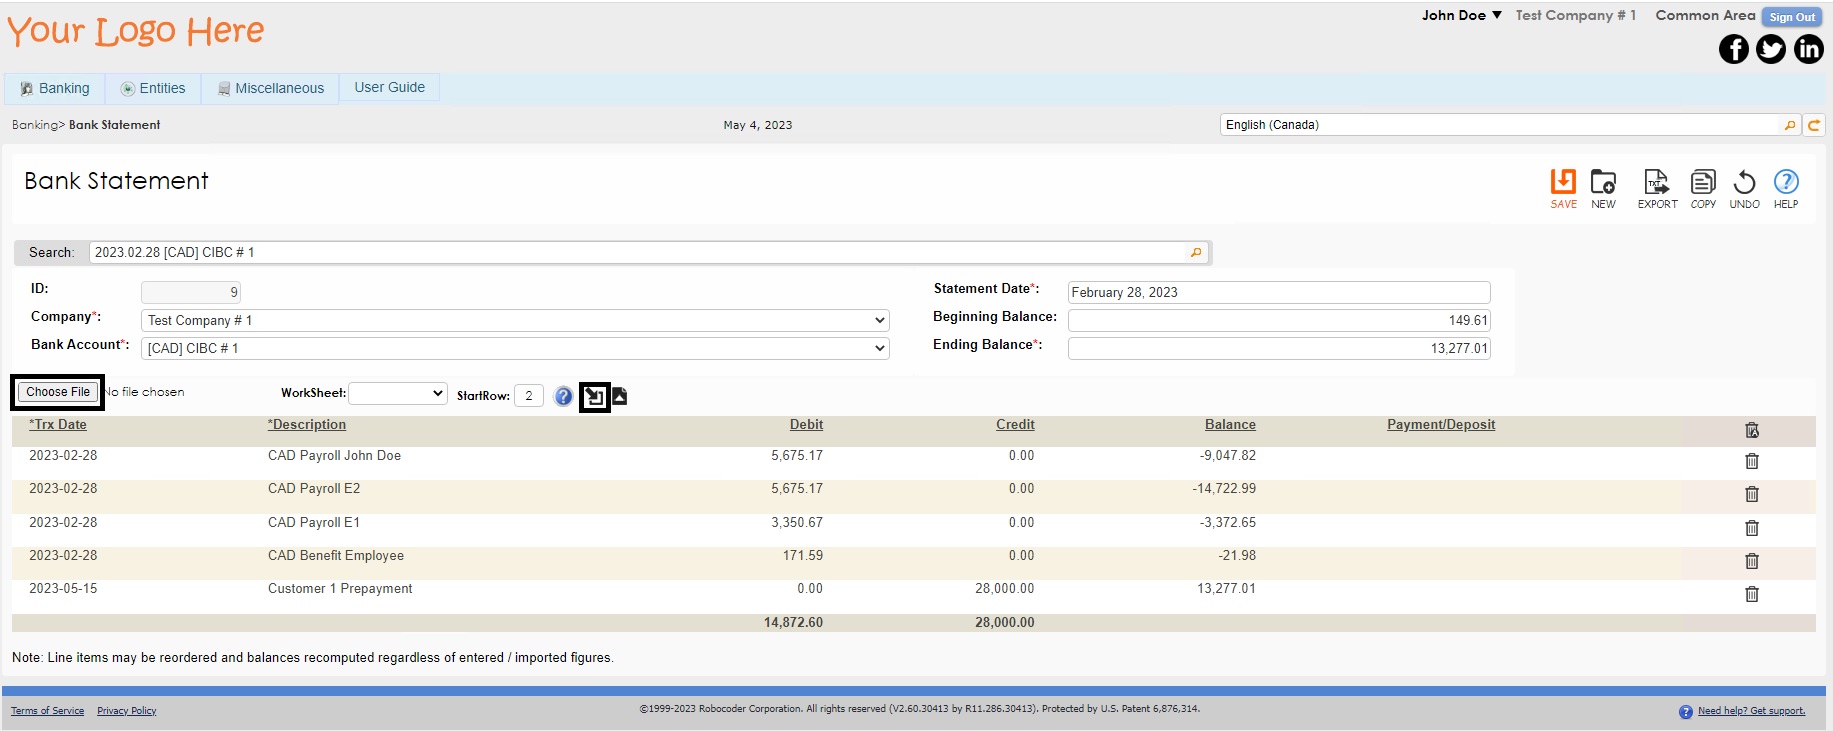
Each line item in the grid can be immediately populated with the Payment/Deposit attached to the line item by simply clicking on the line item. Verify that the Payment/Deposit are attached to their corresponding line item before saving the statement.
Upload Bank Statements
The uploading of Bank Statements help set up the new balances for the Bank Accounts and reconciliation of these accounts in 1ERP.
Navigation: Banking -> Bank Statement
To add bank statements to 1ERP, users can manually enter each transaction or do a bulk import.
Enter Manually
Any new bank statements will need to be formatted to the downloaded Bank Statement Excel spreadsheet before they can be imported into 1ERP. A sample statement is shown below for a sample Bank Account created.

Import in Bulk
To do a bulk import, click on the Import Panel icon (document with inverted triangle) directly above the table and click on the blue question mark icon, where an import template is made available at the bottom of the page. Bulk uploads of bank statements will need to use this import file template. The necessary information can be filled in and uploaded into 1ERP.
Select the WorkSheet and StartRow, and click the Import icon (arrow pointing to the bottom right towards a document) next to the Import Panel icon. Click the SAVE button to save the import.
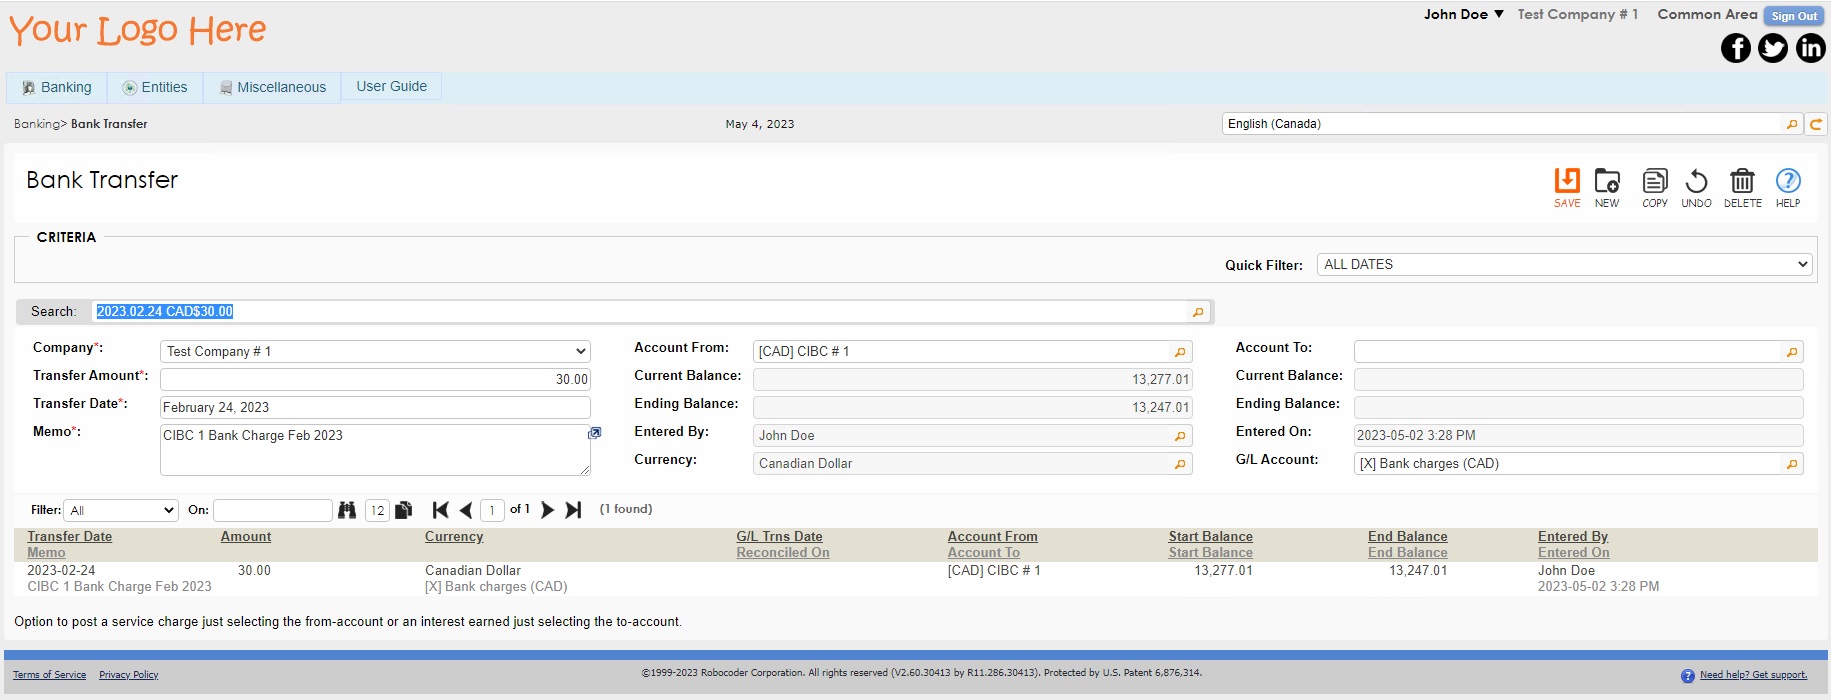
Create a Bank Transfer
Navigation: Banking -> Bank Transfer and follow the steps below:
-
Choose a bank account in the “Account From” field from where the amount is to be withdrawn from.
-
Choose a bank account in the “Account To” field to which amount is to be deposited to.
-
Enter the “Transfer Amount” to be withdrawn from the “Account From” bank account to the “Account To” bank account.
-
Click SAVE to complete the Bank Transfer.

Record Bank Service Charge
Navigation: Banking -> Bank Transfer and follow the steps below:
-
Choose a bank account in the “Account From” field from where the amount is to be withdrawn for the bank service charge or interest charge.
-
Enter the “Transfer Amount” to be withdrawn from the “Account From” bank account.
-
Click SAVE to record the Interest/Bank Service Charge.
Record Interest Earned:
Navigation: Banking -> Bank Transfer and follow the steps below:
-
Choose a bank account in the “Account To” field from where the amount is to be deposited for the interest earned.
-
Enter the “Transfer Amount” to be deposited into the “Account To” bank account.
-
Click SAVE to record the Interest Earned.

Reports in Common Area
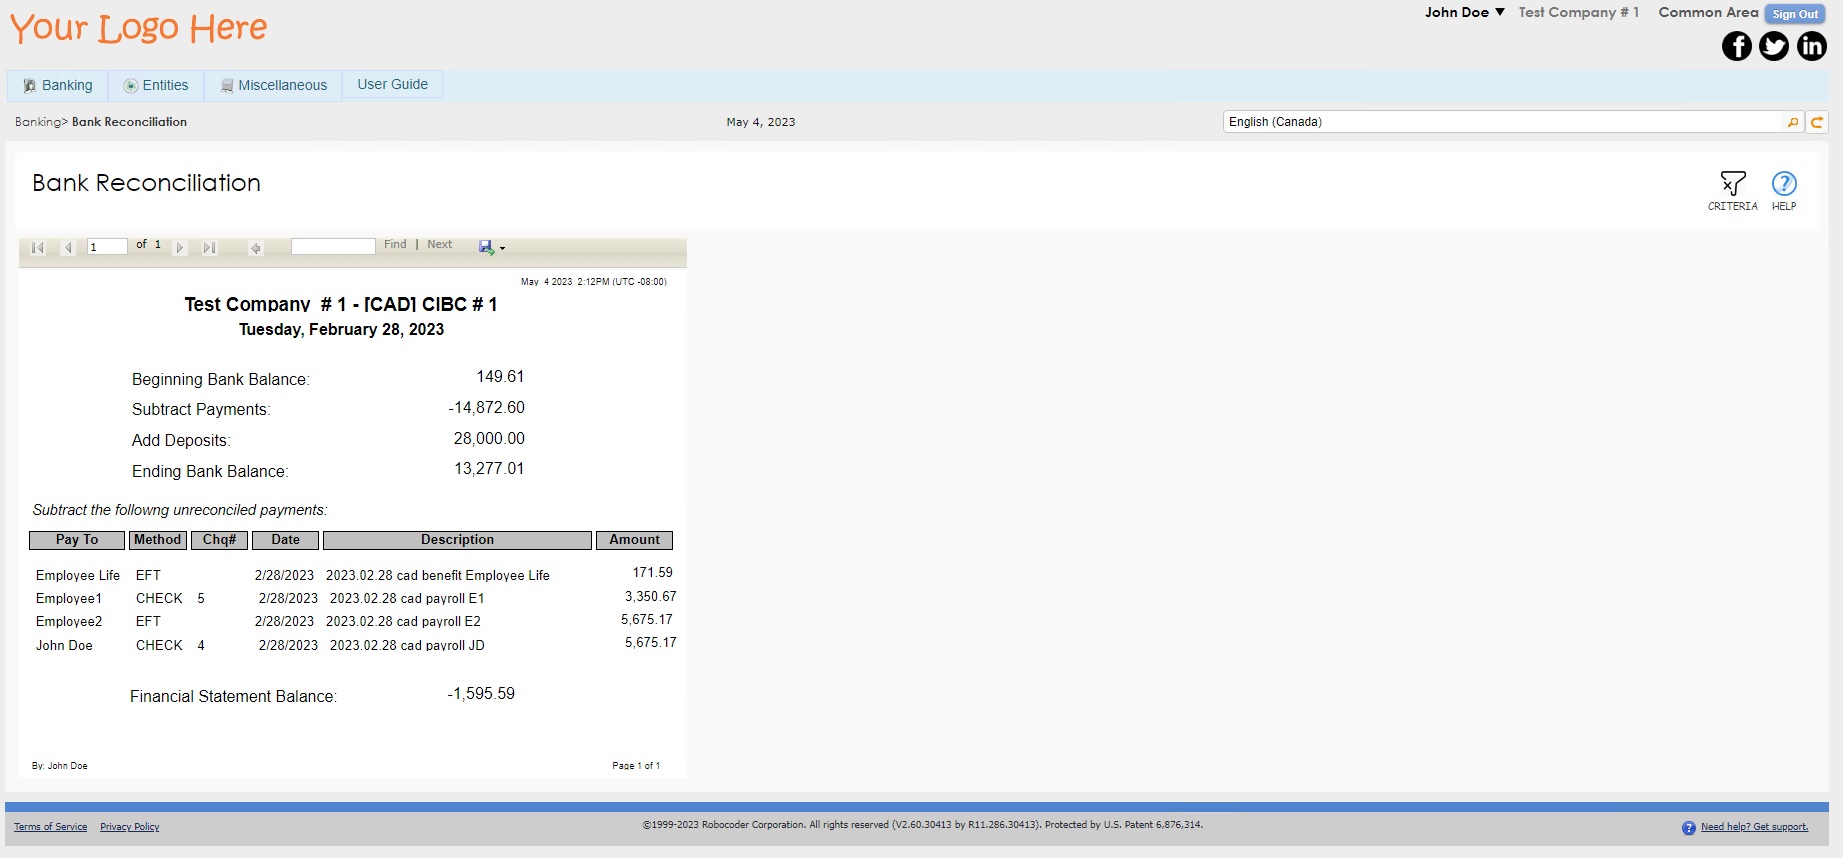
Bank Reconciliation
The Bank Reconciliation report in 1ERP provides a clear and concise summary of all banking transactions, including deposits, withdrawals, and any adjustments made by the bank (i.e., fees or interest earned). The report also highlights any discrepancies between the bank balance and the company's ledger balance, allowing for quick identification and resolution of any issues.
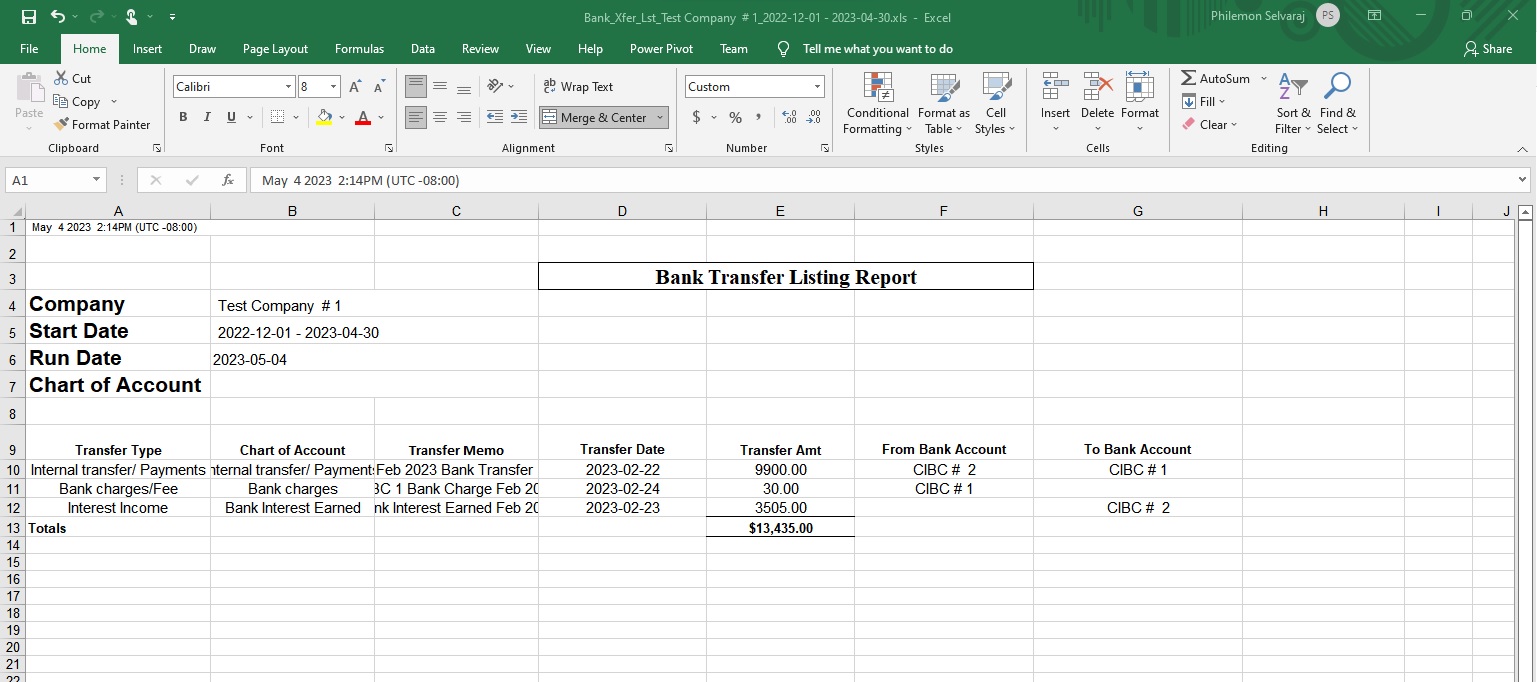
Bank Transfer Listing
The Bank Transfer Listing report is designed to help easily reconcile bank accounts. The report can be used to compare the transactions recorded in Bank Statements with the transactions recorded in 1ERP. This allows users to identify any discrepancies and maintain records that are accurate and up-to-date.