General Ledger
Introduction
The General Ledger (G/L) module is 1ERP's core and gives 1ERP the ability to streamline accounting processes. In the past, some organizations would solely use this module for accounting purposes and record each transaction as journal entries. While this approach may seem straightforward, this led to a cluttered table filled with unnecessary details, resulting in a significant slowdown in reporting.
1ERP addresses this challenge with the General Ledger by simply summarizing essential information from all subsystems periodically. Instead of storing all transaction details within the accounting module, 1ERP adopts a "divide and conquer" approach. This allows subsystems to retain the transactional details, while only extracting and summarizing the necessary information for accounting purposes in General Ledger.
This division of responsibilities creates a more streamlined and optimized approach to financial management and reporting within the organization. 1ERP effectively eliminates the issue of a cluttered table and improves reporting efficiency.
Set Up General Ledger
To set up the G/L module, please watch the 1ERP Initial Setup video. It is recommended to set up the General Journal Accounts before using the General Ledger module.
Features in General Ledger
Enter Journal Entry
The Journal Entry screen serves as a central hub for recording journals and can be sourced automatically and manually. By incorporating these two types of sources for journal entries, 1ERP maintains comprehensive coverage of financial transactions within the system.
The "Journal Entry" screen serves as a central platform to capture, manage, and track all types of journals, providing organizations with accurate and up-to-date financial records.
Automatic
From Subsystems: generate journals automatically from various subsystems within the ERP system (i.e., from the Accounts Payable or the Accounts Receivable module). This ensures that relevant financial transactions are seamlessly captured in the journal entries.
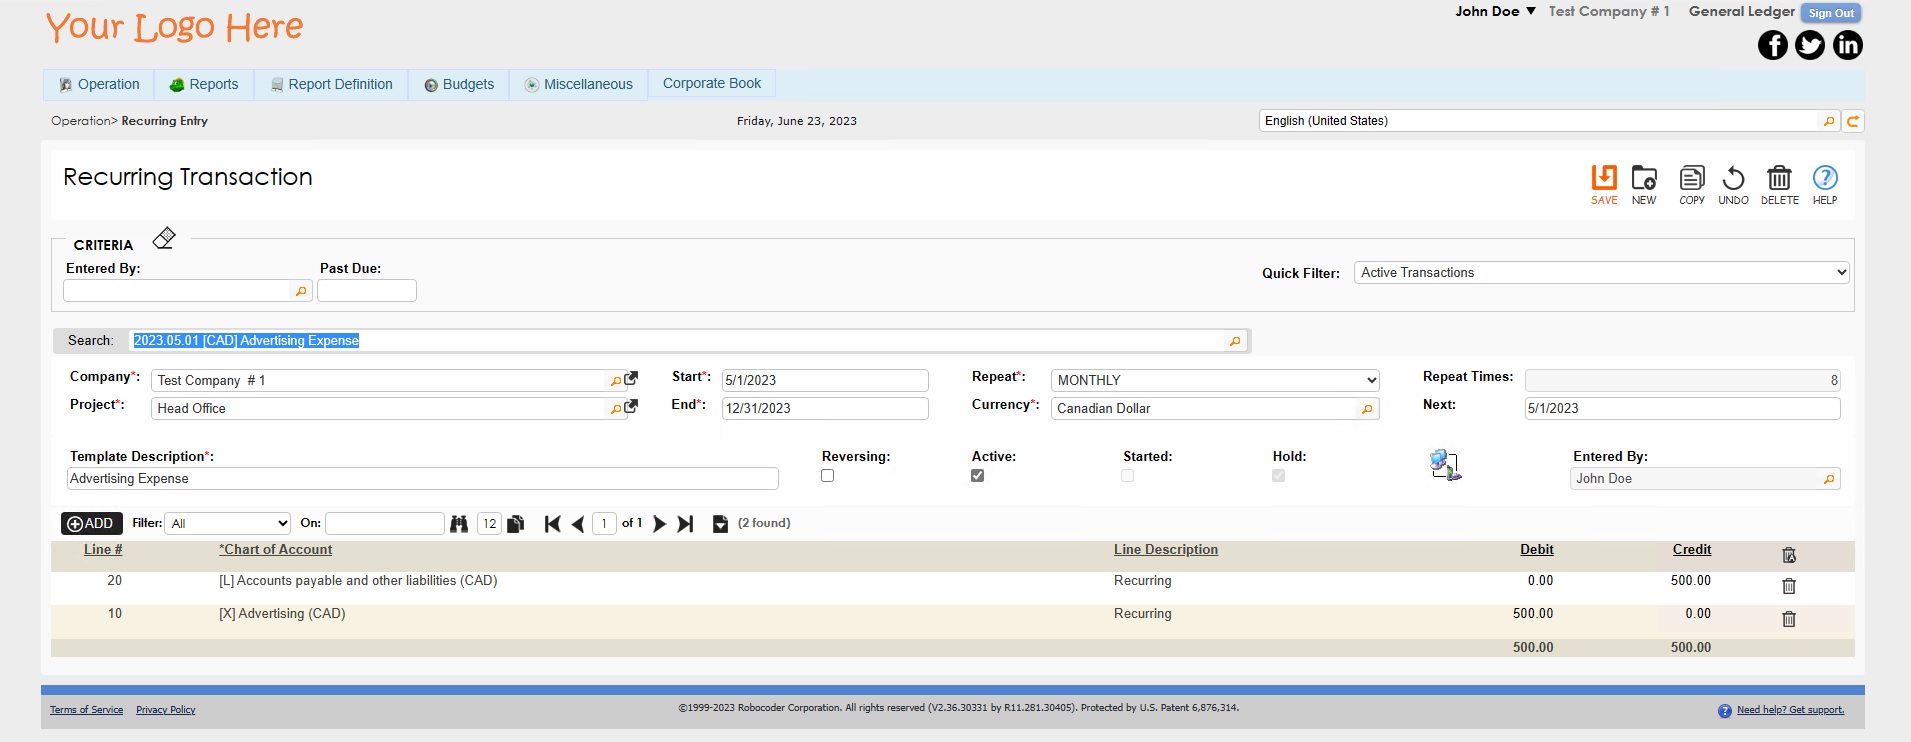
Recurring Entry: enables for easy tracking of periodic recurring journals. By setting up predefined recurring entries, organizations can automate the generation of journals for repetitive transactions, saving time and effort. See "Enter/Post Recurring Entry" on this page for more info.
Manual
Enter journals manually ad-hoc. This enables users to record specific transactions that may not fall under the automatic categories. Manual entries offer versatility in capturing unique or one-time transactions that require journal documentation.

Post Journal Entry
Posting a Journal Entry can be done through two screens: (1) the Journal Entry screen; or (2) the Journal Posting screen.
Journal Entry Screen
The "Journal Entry" screen enables you to post finalized journals individually for higher accuracy and more control over each entry.To post a Journal Entry in the "Journal Entry" screen:
- Select the journal to post in the "Search" bar.
- Click the icon under the "Hold Flag" checkbox to un-hold the Journal Entry and post it to the G/L.
Journal Posting Screen
Alternatively, users can use the "Journal Posting" screen to post multiple finalized journals simultaneously, streamlining the process for efficiency. To post multiple Journal Entries in the "Journal Posting" screen:
- Uncheck the "Hold" checkbox on each line item (to select particular entries to post) or on the table header (to post all entries in the table).
- Click POST.

Enter/Post Recurring Entry
Entering recurring entries can only be accomplished through the "Recurring Entry" screen but posting recurring entries can be performed through two screens: (1) the "Recurring Entry" screen; and (2) the "Recurring Posting" screen.
Recurring Entry Screen
The "Recurring Entry" screen enables you to create and post recurring journals on an individual basis to conveniently automate repetitive transactions. To post a Journal Entry in the "Recurring Entry" screen:
- Select the journal to post in the "Search" bar.
- Click the icon on the right hand side of the "Hold" checkbox to un-hold the Journal Entry and post it to the G/L.
Recurring Posting Screen
Alternatively, users can use the "Recurring Posting" screen to post multiple recurring journals at once, ultimately saving more time and effort. To post multiple Journal Entries in the "Recurring Posting" screen:
- Uncheck the "Hold" checkbox on each line item (to select particular entries to post) or on the table header (to post all entries in the table).
- Click POST.
Accounts Categorization
To faciliate easier and more simple organization of accounts in 1ERP, especially for businesses with global operations, the system uses Natural Accounts and Chart of Accounts (COA) to map out accounts in the system.
Natural Accounts and COA
In 1ERP, a Natural Account can have multiple Chart of Accounts (COA) linked to it––this is particularly useful for dealing with various currencies, departments, locations, and sources. This flexibility allows for comprehensive financial reporting and analysis.
To view Natural Accounts or Chart of Accounts in more detail, the Trial Balance report can be generated and be presented in the original, functional, or presentation currency, depending on the user's reporting needs.
Account and Journal Type
Account Type and Journal Type serve as self-explanatory classifications within 1ERP, providing additional categorization and organization for financial data.
Customize Financial Statement
To customize the Income Statement, Balance Sheet, and Cash Flow Statement, users can use the "Statement Columns Map" and "Statement Rows Map" screens. These tools enable users to modify the structure and layout of these financial statements according to their specific needs. By mapping the appropriate Natural Accounts to each Statement Row, users can present financial information more accurately and in a meaningful way.
Note: please navigate to the "Accounts Map Exception" screen to ensure that all Natural Accounts have been mapped. Otherwise, 1ERP will not function as intended.
The remaining steps and processes involved in month-end activities are covered comprehensively in the Month End Process Guide and Video, ensuring a smooth and systematic approach to financial management and reporting.
Reports in General Ledger
The General Ledger module provides numerous reports to present up-to-date information on all of the organization's GL related activities.
Trial Balance
Navigation: Reports -> Trial Balance
The Trial Balance Report provides a consolidated view of the balances in all General Ledger accounts within an organization. It serves as a summary of account activity for a specific accounting period. This report can be generated and printed for a defined fiscal month, offering valuable insights into the financial status of the organization.
General Ledger
Navigation: Reports -> General Ledger
The General Ledger report presents the detailed General Ledger postings for a specified module within a specific date range. It offers comprehensive information about the financial transactions recorded in the system, providing for valuable insights into account activities and accurate financial reporting.
Financial Statements
Navigation: Reports -> Statement Report Writer
The Financial Statements offer financial information in a comprehensive and easy-to-understand method. These reports include the Income Statement, Balance Sheet, Cash Flow Statement, and Quarterly Statements.
Navigation: Report Definition -> Statement Columns Map / Statement Rows Map / Natural Accounts Map / Accounts Map Exception
Using "Report Definition" and its sub-menus on the menu bar, users can customize various settings for the financial statement reports, enabling for flexible and personalized reporting. Users can define new reports and access these reports in the "Statement Report Writer" screen to generate accurate and tailored financial insights.
Chart of Accounts
Navigation: Miscellaneous -> Account Manager -> Chart of Accounts
The Chart of Accounts report is the complete listing of all the accounts in the General Ledger module. This report provides a list of all account names, natural account name, account number, status of the accounts, and other related information.
To generate this report:
- Navigate to Miscellaneous -> Account Manager -> Chart of Accounts.
- Leave the "Search" bar empty.
- Click on the EXPORT button (this will generate the list of COA in an Excel spreadsheet format).