Month End Process
Introduction
The Month End Process is a crucial aspect of financial management for businesses, involving a series of steps and tasks that need to be completed at the end of each month to maintain accurate and up-to-date financial records. The process begins with the collection and organization of financial data, such as bank statements and transaction details. This data is then analyzed and reconciled for accuracy and completeness.
During the Month End Process, various financial activities are performed, including payroll processing, verification of time charts, depreciation of assets, management of invoices, reconciliation of bank statements, and compliance checks for taxes and other regulatory requirements. These tasks ensure that all financial transactions are properly recorded for, liabilities are accounted for, and financial statements are accurately produced.
As the Month End Process progresses, financial reports and statements are generated, such as trial balances, income statements, balance sheets, and cash flow statements.
To watch a video on this Month End Process, please navigate to our website's resources page.
Step 1: Banking
The first step of the Month End Process is to bring banking information into 1ERP, involving a series of steps to integrate data accurately and efficiently.
Step 1
To start, download bank statements from the relevant bank accounts for the previous month. These statements serve as the primary source of transactional data.
Step 2
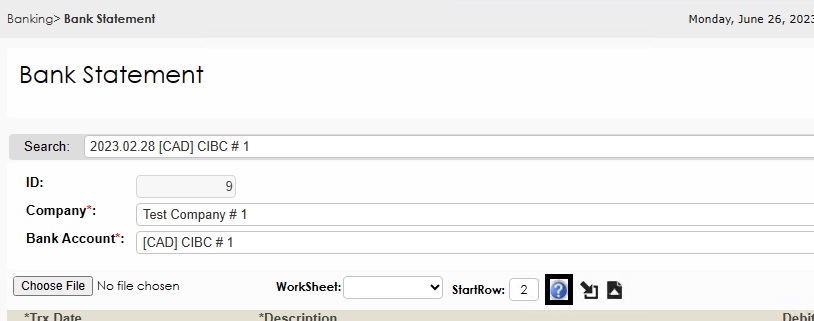
Download the import Excel template from the "Bank Statement" screen (click the import panel button (document with inverted triangle) and then click on the blue question mark button).
Step 3
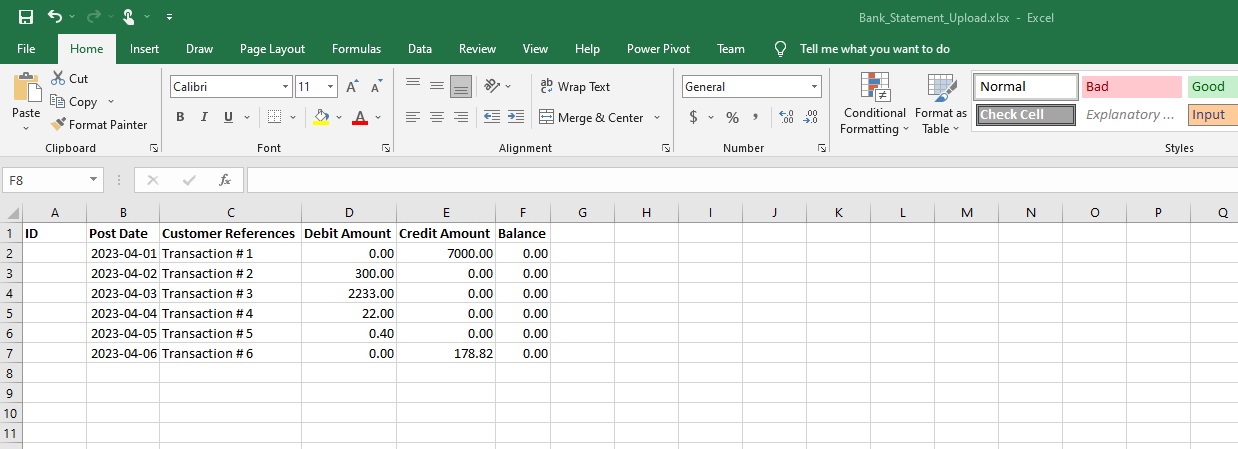
Enter the statement details according to the columns of the downloaded import template.
Step 4
Carefully review transactions against their corresponding Accounts Payable (AP) Bill Payment, Accounts Receivable (AR) Invoice Payment, and Common Area Bank Transfer entries.
Step 5
Use the Common Area Bank Transfer entries to post any additional banking transactions that cannot be directly processed in the AP or AR modules. This includes posting bank charges, interest earned, transfers between internal banking accounts.

Step 6
Upload the import templates for the previous month into the "Bank Statement" screen in the Common Area by clicking the import panel button, uploading the file, and clicking the upload button (arrow pointing to the bottom-right of a document).
By following the steps above, users can accurately record all relevant banking information in 1ERP.

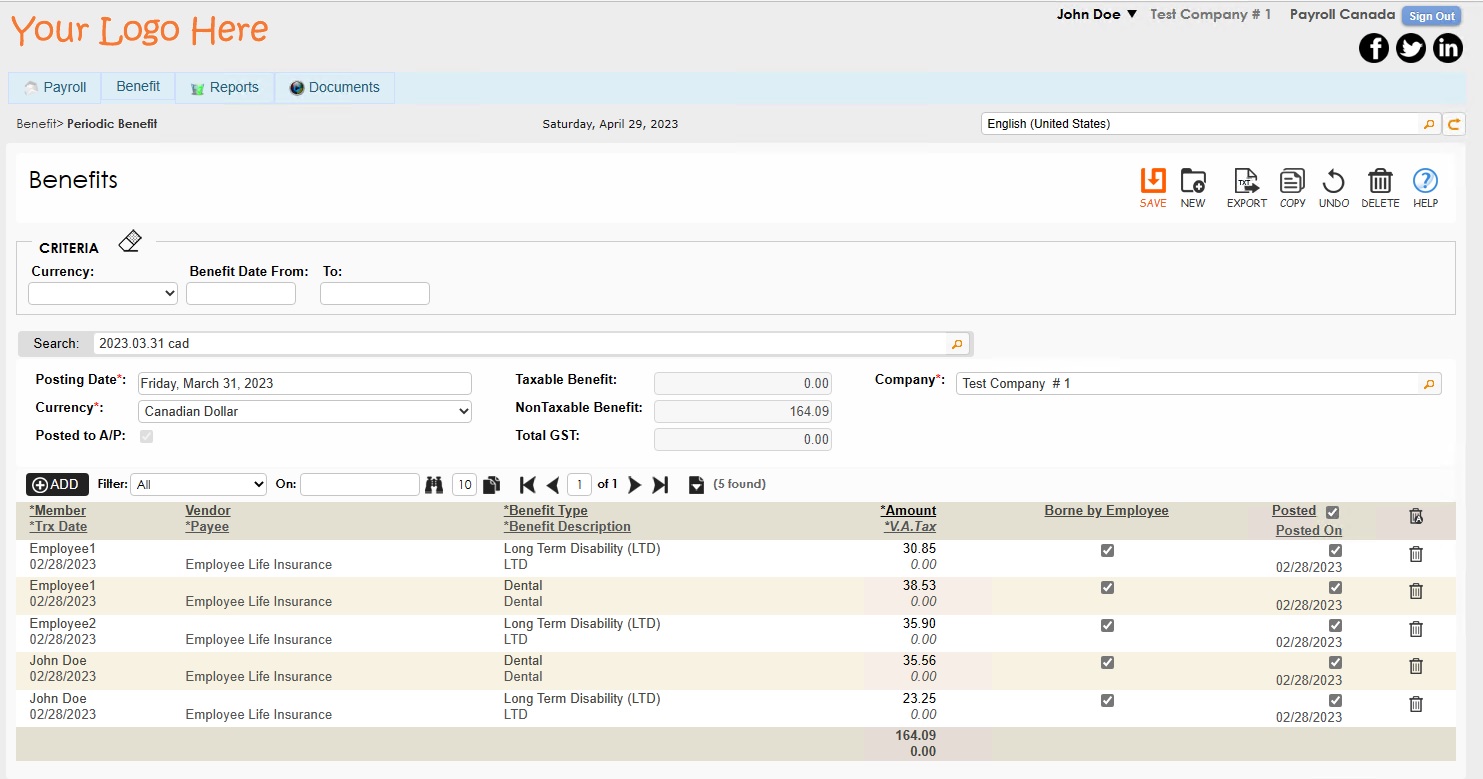
Step 2: Payroll
The second step of Month End is to complete the following processes in the Payroll module.
Step 1
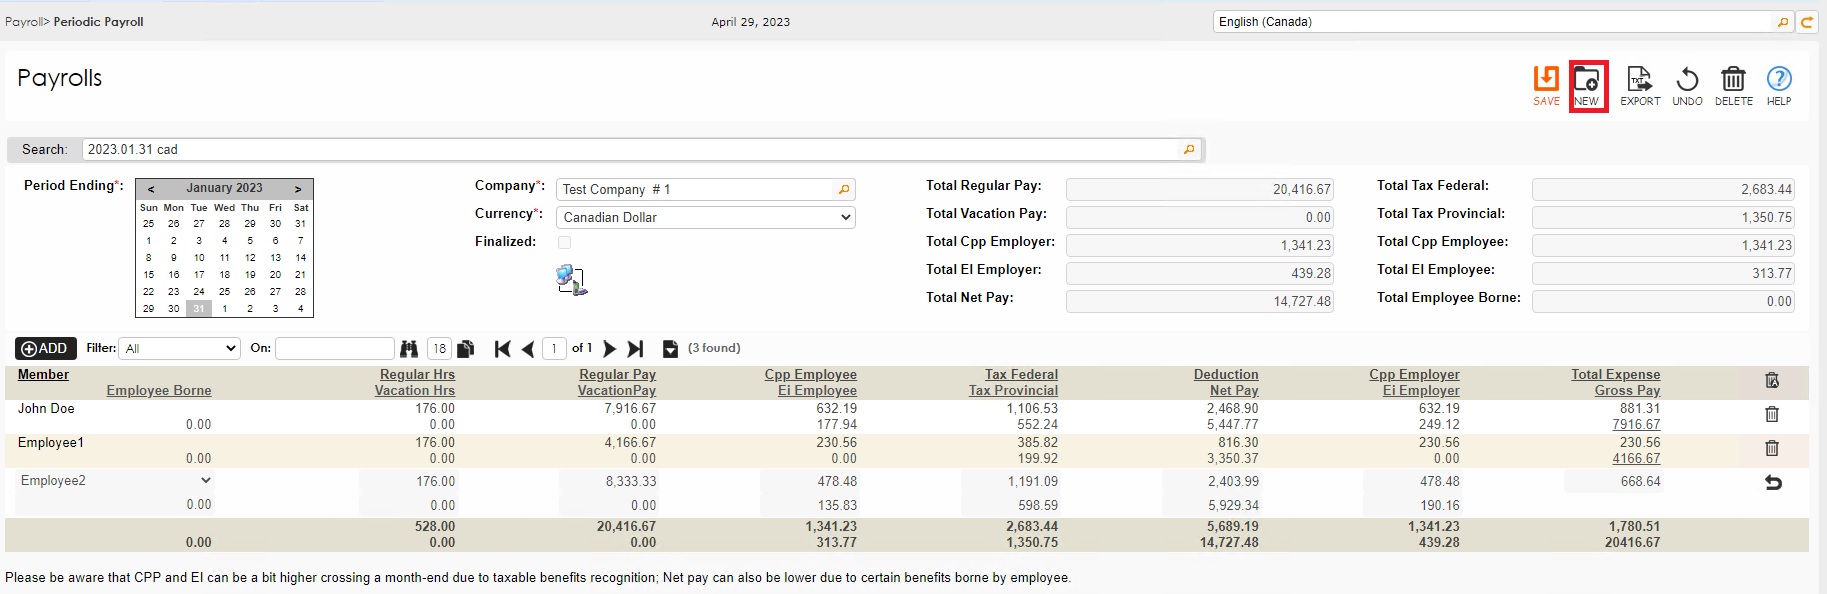
Verify that all Periodic Payroll entries and Payroll Periodic Benefits for the previous month have been finalized and posted in the Payroll module.
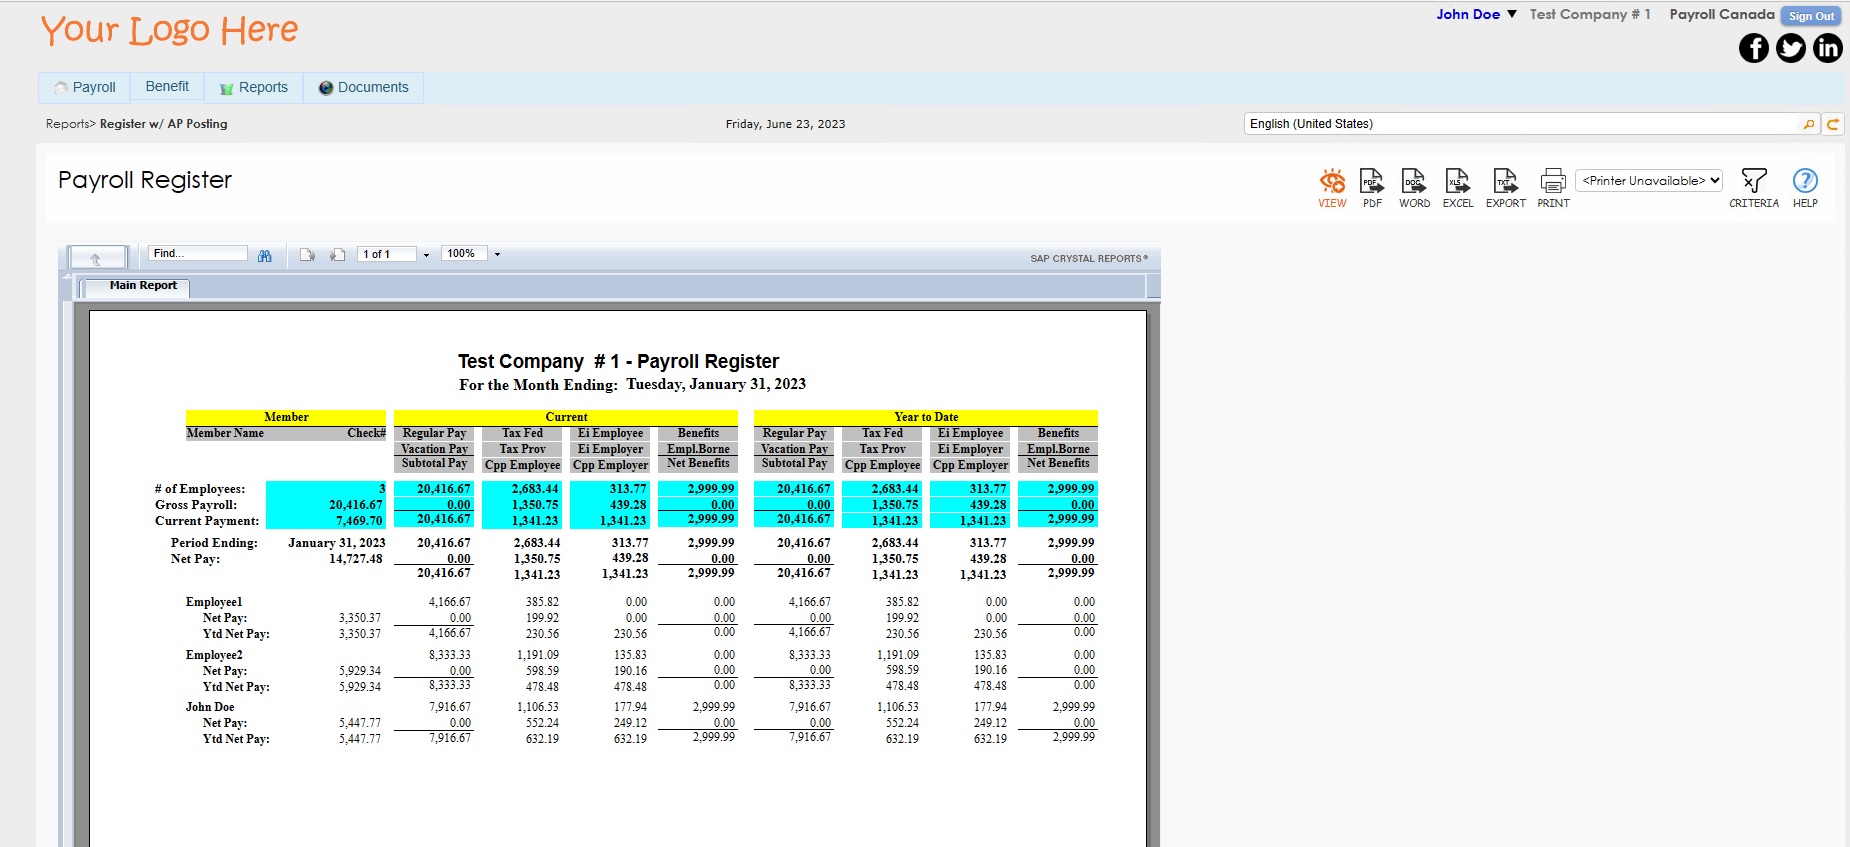
Step 2
Generate the Payroll Register. This report provides a summary of payroll transactions for the previous month
Step 3
Navigate to the Accounts Payable module and create any necessary entries for Payroll Source Deductions using the "Bills" screen. This step ensures that all source deductions (i.e., income tax or pension contributions) are accurately recorded and accounted for.

Step 3: HR Management
The third step of Month End is to complete the following processes in the HR Management module, especially for Customer Relation Management (CRM) and time tracking purposes.
Note: for the CRM of service-providing companies, use the HR Management module to manage and track interactions with clients who charge based on time. Access the time charts to ensure that all required time entries are accurately filled in. Each entry will be highlighted in the time chart, indicating that the necessary information has been provided.
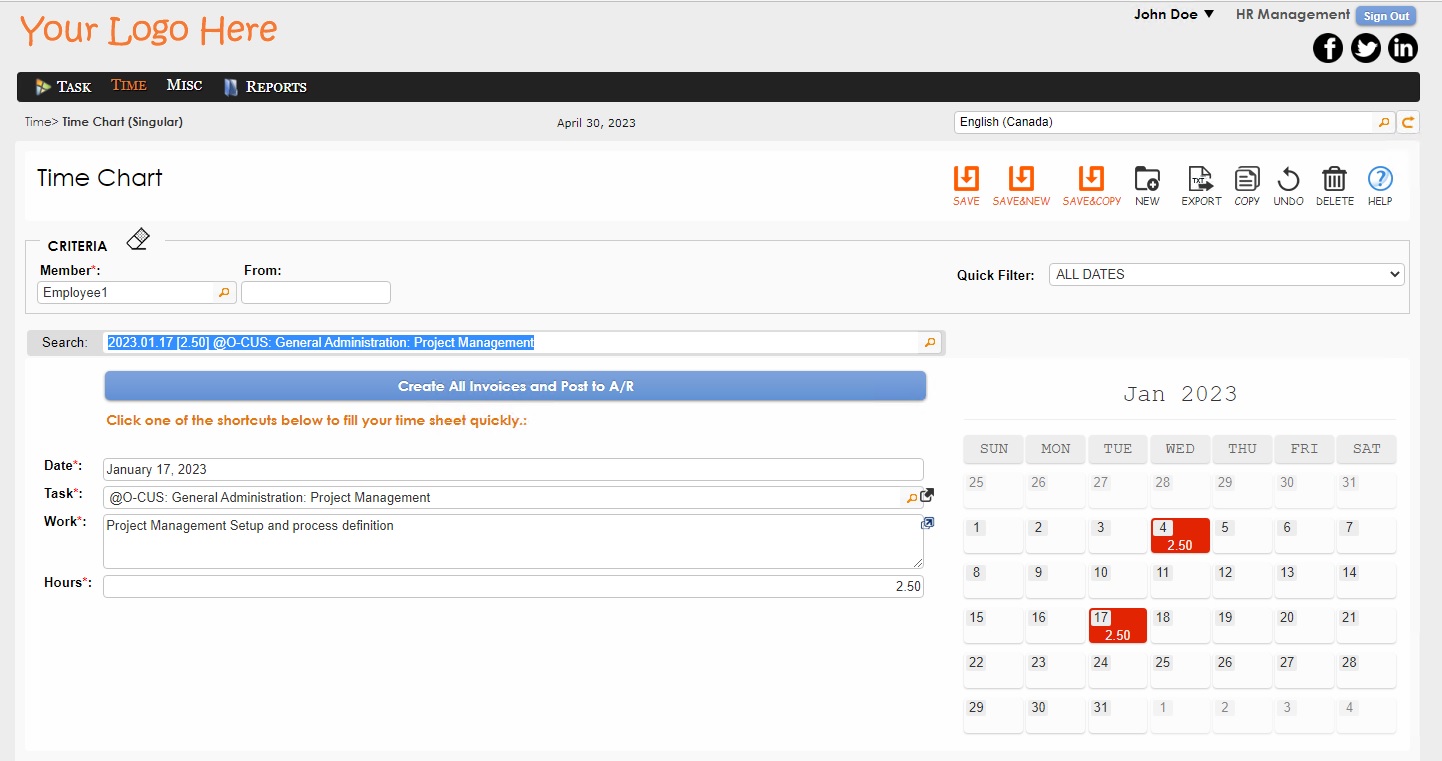
Step 1
Navigate to the "Time Chart (Multiple)" screen to validate the details recorded and verify that all entries are completed properly.

Step 2
Navigate to the "Time Chart (Singular)" screen and click the "Create All Invoices and Post to A/R" button.

Step 4: Fixed Asset
The fourth step of the Month End is to complete the following processes in the Fixed Asset module.
Step 1
Navigate to the "Depreciation" screen and click the NEW button to calculate the depreciation for all the assets in the system for the current period.
Step 2
Click the finalized button to post the depreciation to the required modules in 1ERP.

Step 5: Accounts Receivable
The fifth step of the Month End is to complete the following processes in the Accounts Receivable (AR) module.
Step 1
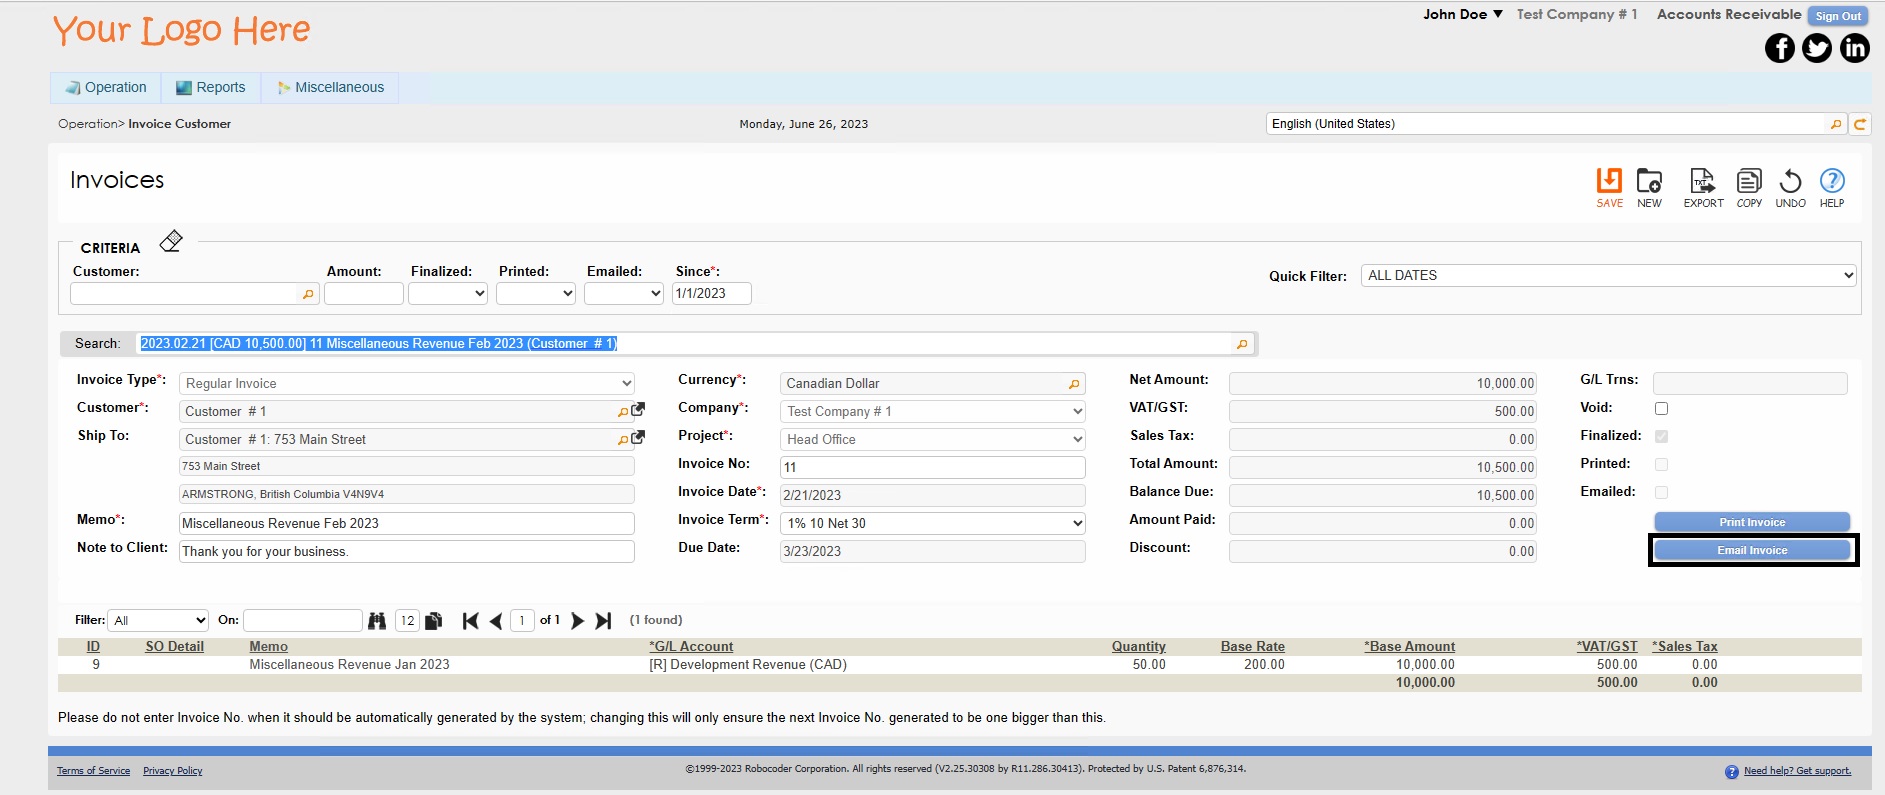
Verify unfinalized invoices and create new invoices either by generating invoices from recurring templates or making a copy of previous invoices to edit.
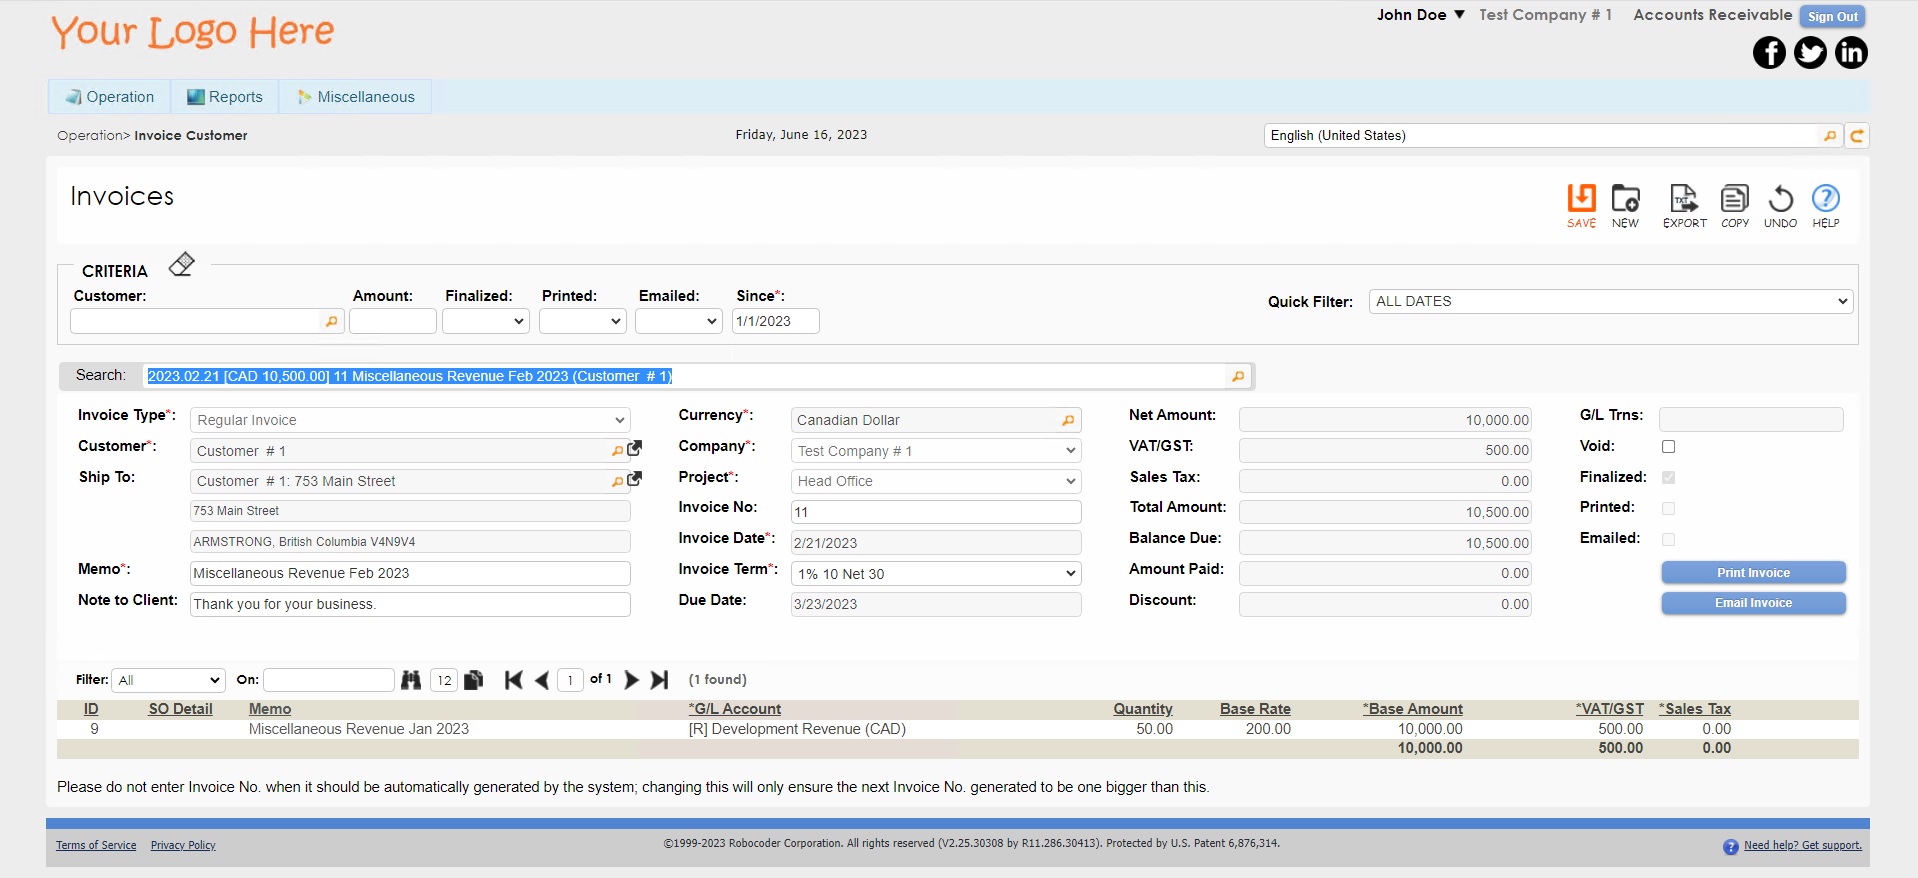
Step 2
Select the invoice, click on the COPY button, and then proceed to print or email the invoice directly to the customer. If the user chooses to print the invoice, the invoice is saved as a PDF and can then be manually sent via email to the customer.
This streamlined process efficiently handles invoicing tasks within the system, providing flexible and convenient management over invoices.
Step 6: Foreign Exchange
The sixth step of the Month End is to complete the following processes in the Foreign Exchange section in the Common Area module.
Step 1
Verify that the last day of the previous month has been included for each currency used.
Step 2
To enter in a foreign exchange rate, use the automated system to populate the exchange rates or manually enter your own values. Check that the last column is indeed the desired end date for the desired exchange rate.

Example: if the user is working with the end of February, enter the exchange rate and specify February 28 as the end date. The system will automatically adjust the date to one day before––in this case, Feb 27––to accurately track and manage foreign exchange rates.
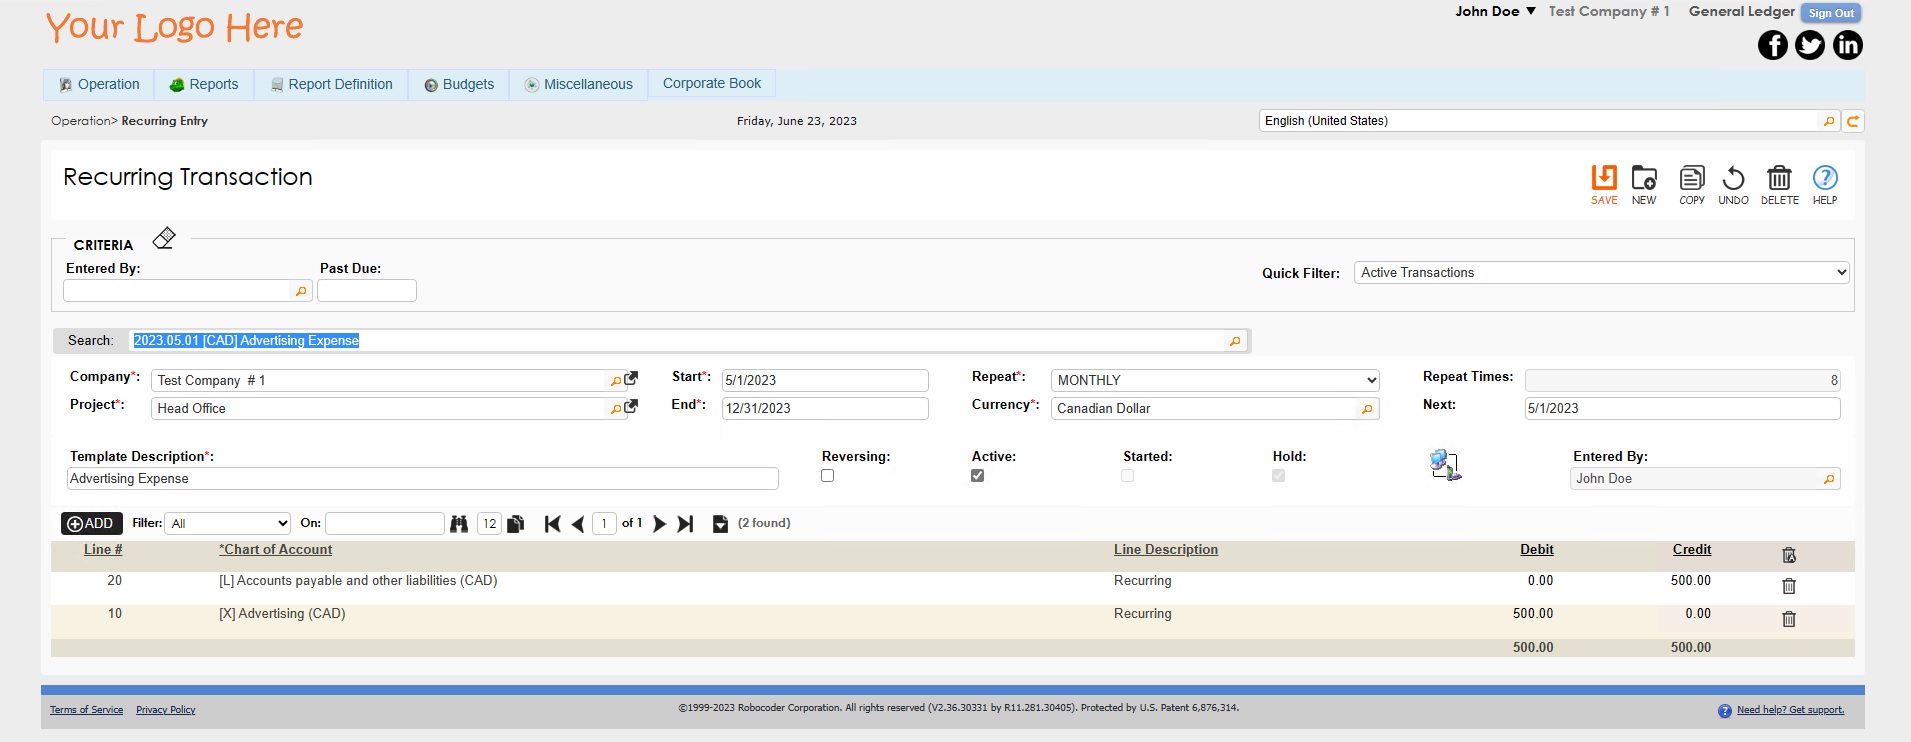
Step 7: General Ledger
The seventh and final step of the Month End is to complete the following processes in the General Ledger module.
Step 1
Create recurring General Ledger entries by posting the recurring entries using the "Recurring Entry" screen.
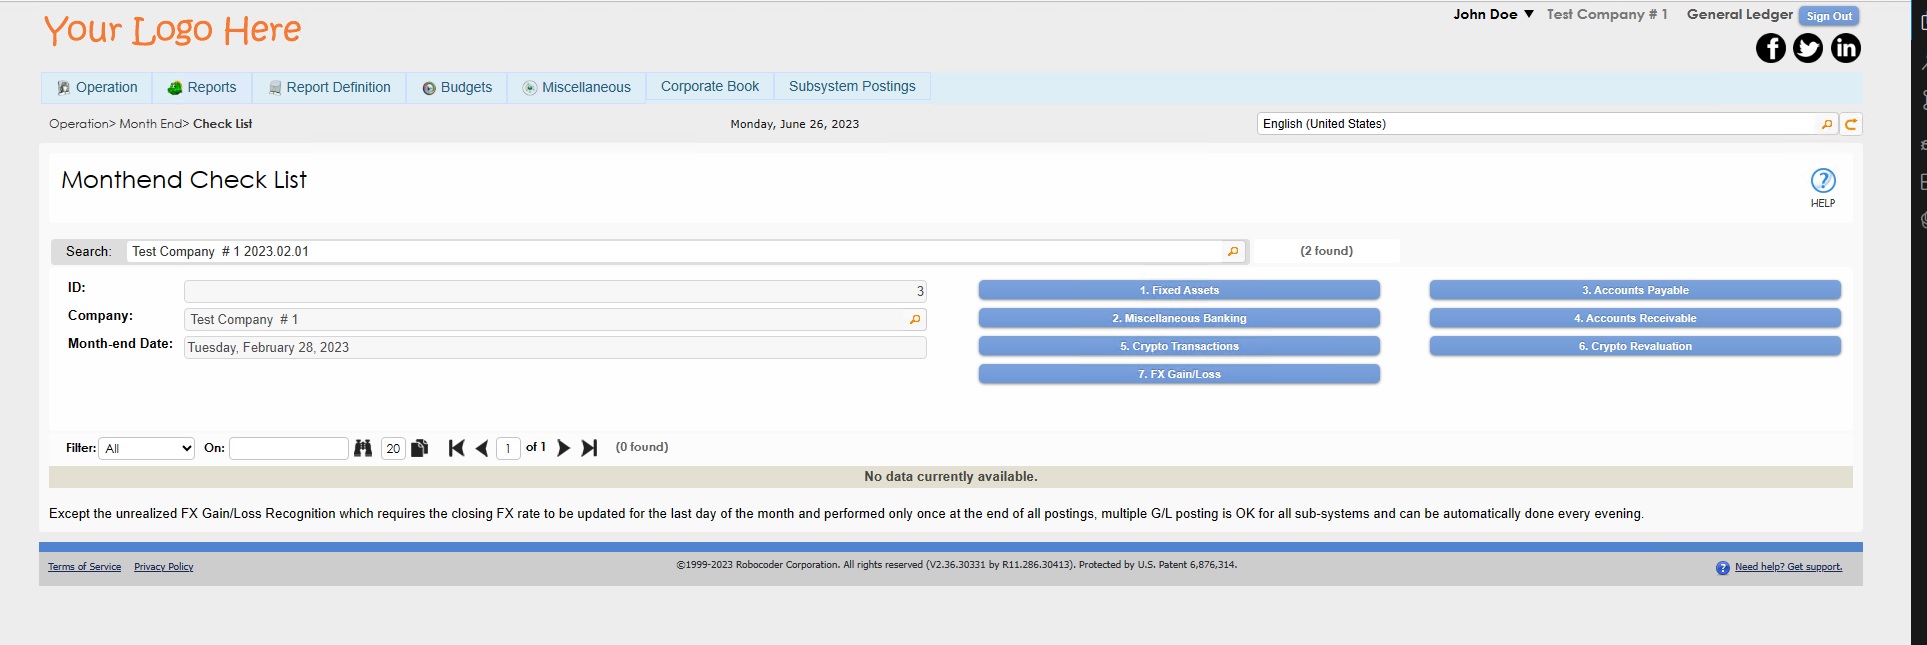
Step 2
Navigate to the "Monthend Checklist" screen and generate journal entries from the following subsystems by clicking on each blue button: Fixed Assets, Miscellaneous Banking, Accounts Payable, Accounts Receivable, Crypto Transactions, Crypto Revaluation, and FX Gain/Loss.
Step 3
Verify that payroll source deductions have been completed by using the "Bills" screen in the Payroll module.
Step 4
Reconcile all of your bank statements by generating the "Bank Reconciliation" report in the Commmon Area module. Printing out the "Bank Reconciliation" reports can make the process more efficient.
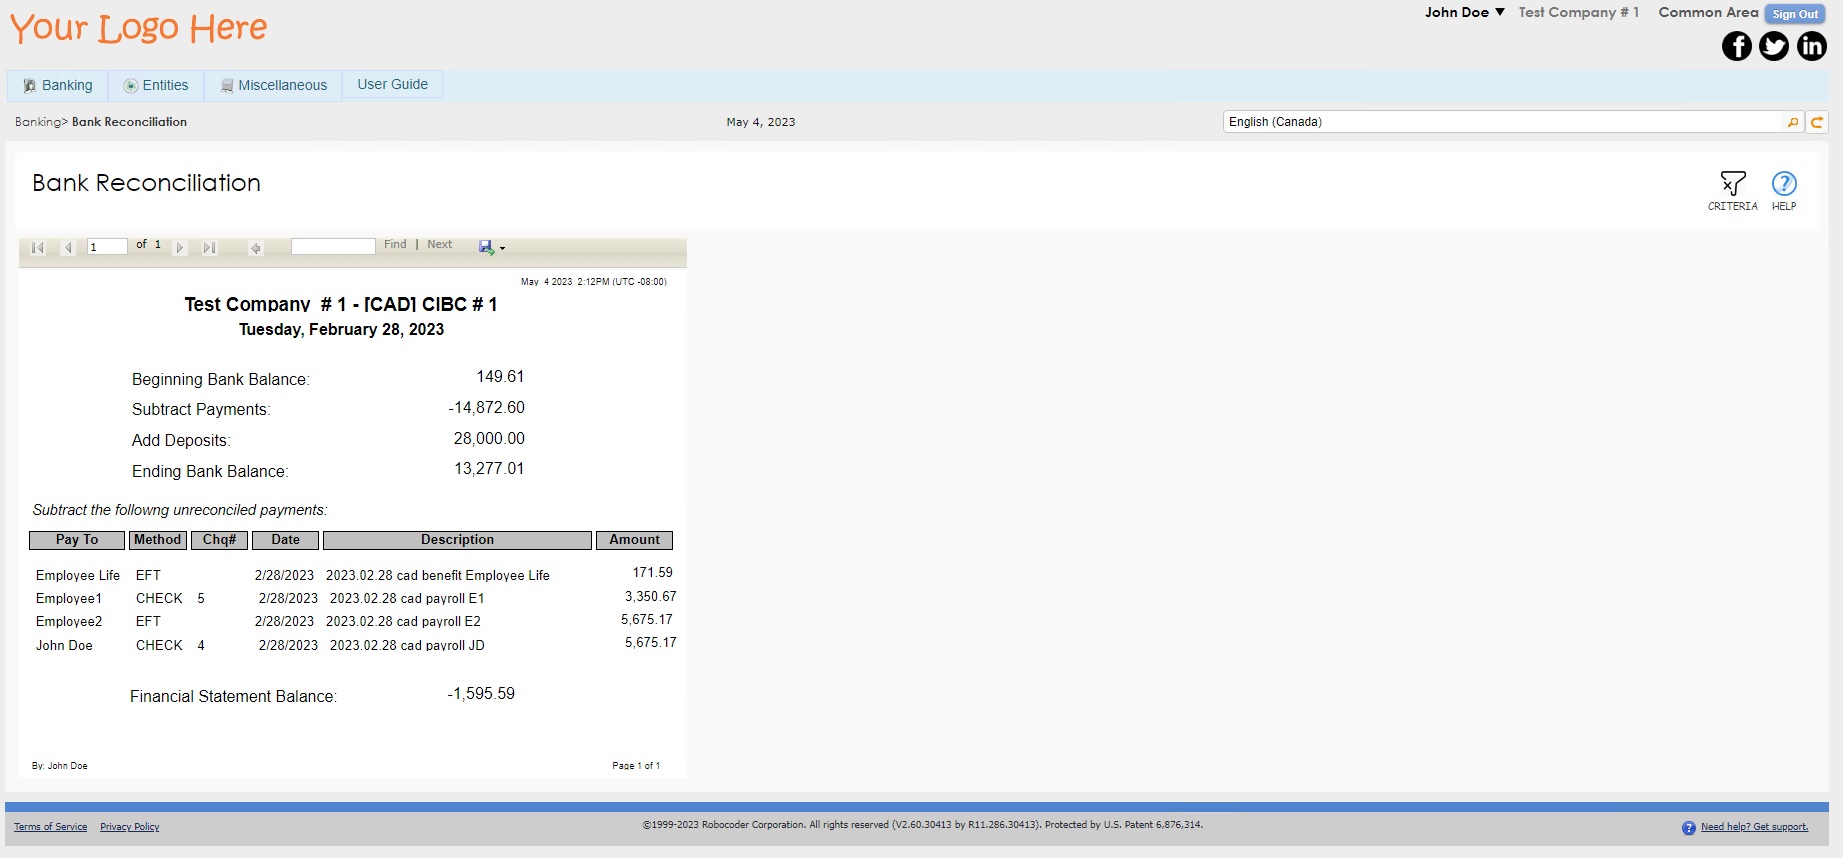
If any issues arise, revisit the Monthend Checklist and make any necessary adjustments. Post any new Journal Entries using the "Journal Posting" screen.
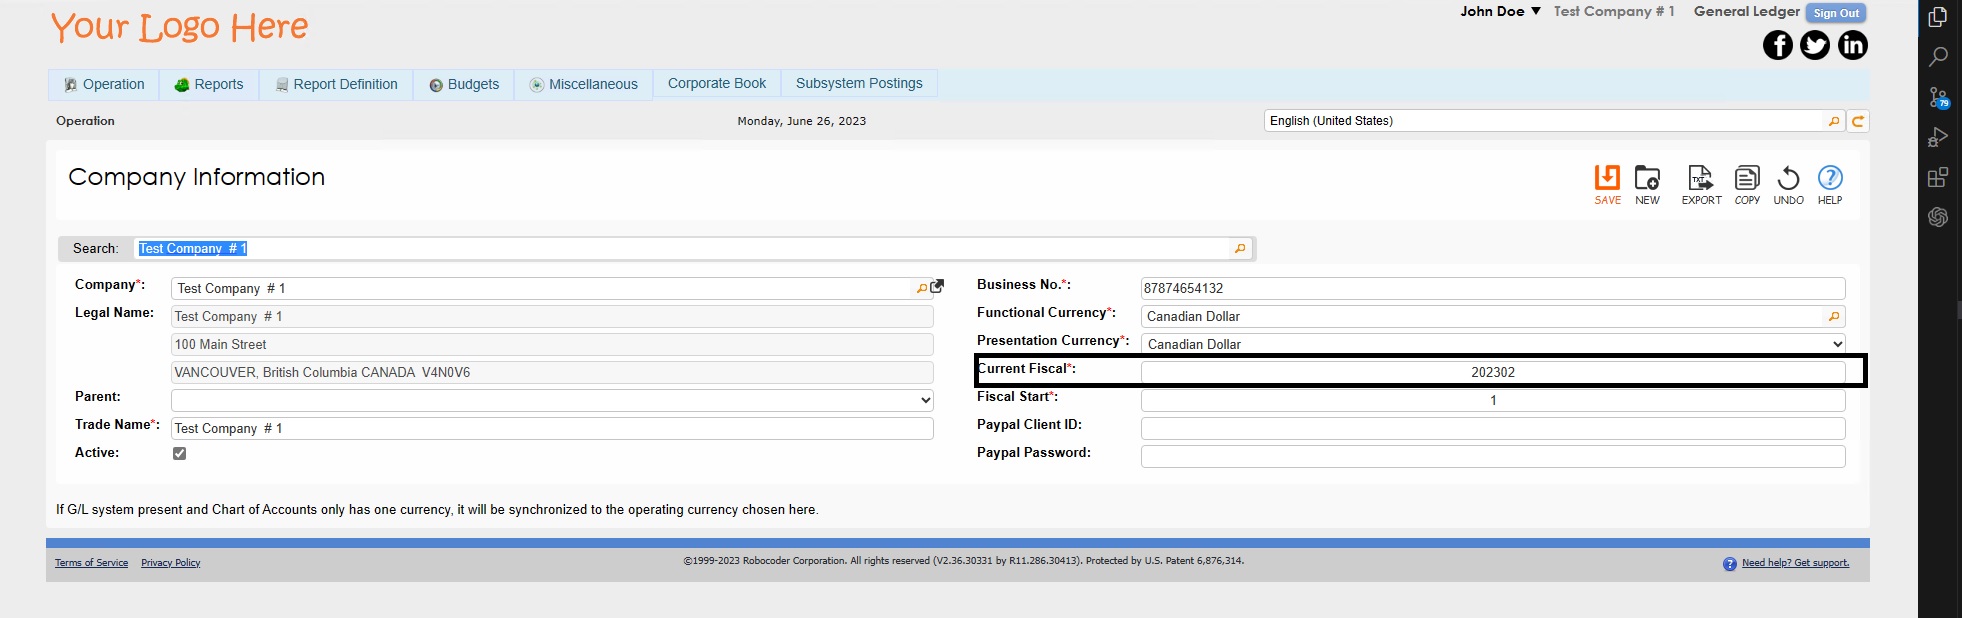
Step 5
Navigate to "Monthend Rollover Fiscal", change the date in the "Current Fiscal" field to the next month, and click SAVE to complete the Month End Process. Please pay attention to any warnings that may arise during this rollover process.